Content Menu
● Understanding SMT and Its Advantages
● Essential Tools and Materials for DIY SMT PCB Assembly
● Step-by-Step Guide to DIY SMT PCB Assembly
>> 1. PCB Design and Preparation
>> 2. Solder Paste Application
>> 3. Component Placement
>> 4. Reflow Soldering
>>> Option 1: Reflow Oven
>>> Option 2: Hot Air Rework Station
>> 5. Inspection and Testing
● Advanced Techniques for DIY SMT PCB Assembly
>> Double-Sided PCB Assembly
>> Fine-Pitch Components
>> Mixed Technology Boards
● Troubleshooting Common DIY SMT PCB Issues
>> Solder Bridging
>> Tombstoning
>> Cold Solder Joints
>> Component Misalignment
● Best Practices for Successful DIY SMT PCB Assembly
● The Future of DIY SMT PCB Assembly
● Conclusion
● FAQ
>> 1. What is the minimum component size I can work with for DIY SMT PCB assembly?
>> 2. How do I choose the right solder paste for my DIY SMT PCB project?
>> 3. Can I use a regular oven for reflow soldering in DIY SMT PCB assembly?
>> 4. How do I handle static-sensitive components during DIY SMT PCB assembly?
>> 5. What are the most common mistakes to avoid in DIY SMT PCB assembly?
● Citations:
Surface Mount Technology (SMT) has revolutionized the electronics industry, allowing for smaller, more efficient, and cost-effective circuit boards. While professional SMT manufacturing processes are complex and require specialized equipment, it is possible to create DIY SMT PCBs at home or in a small workshop. This article will guide you through the key steps involved in making a DIY SMT PCB, providing insights into the process and tips for success.

Understanding SMT and Its Advantages
Before diving into the DIY process, it's essential to understand what SMT is and why it's beneficial for PCB assembly. SMT is a method where electronic components are mounted directly onto the surface of a printed circuit board (PCB) rather than through holes in the board. This technique offers several advantages:
1. Increased component density
2. Smaller overall board size
3. Improved electrical performance
4. Reduced production costs for large-scale manufacturing
For DIY enthusiasts, SMT allows for the creation of more compact and sophisticated electronic projects. However, it does require some specialized tools and techniques, which we'll explore in this guide.
Essential Tools and Materials for DIY SMT PCB Assembly
To successfully create a DIY SMT PCB, you'll need to gather the following tools and materials:
- Soldering iron with a fine tip
- Hot air rework station or reflow oven
- Solder paste (lead-free SAC305 recommended)
- Stencil for solder paste application
- Tweezers (preferably anti-static)
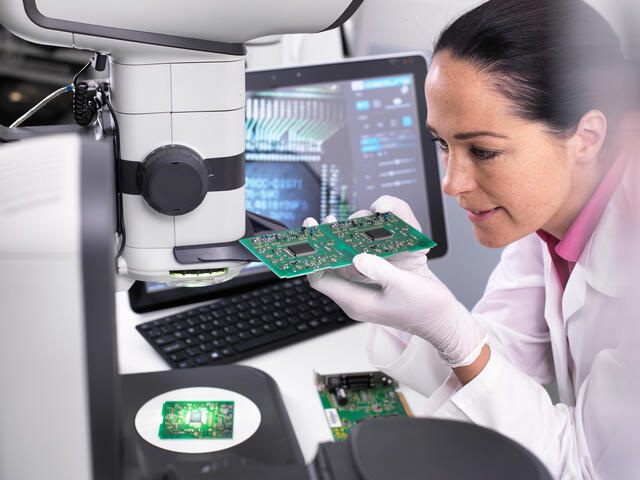
- Magnifying glass or microscope
- Isopropyl alcohol for cleaning
- Flux pen
- PCB board
- Surface mount components
- Multimeter for testing
Having these items on hand will ensure you're well-equipped to tackle the SMT assembly process.
Step-by-Step Guide to DIY SMT PCB Assembly
1. PCB Design and Preparation
The first step in creating a DIY SMT PCB is designing the circuit and preparing the PCB layout. This involves:
- Creating a schematic diagram of your circuit
- Designing the PCB layout using software like Altium Designer or KiCad
- Ensuring proper component footprints and spacing
- Generating Gerber files for PCB fabrication
Once you have your design ready, you'll need to have the PCB manufactured. Many online services offer affordable PCB fabrication for hobbyists and small-scale projects.
2. Solder Paste Application
After receiving your manufactured PCB, the next step is applying solder paste to the pads where components will be placed. This is a critical step in the SMT process:
1. Secure your PCB to a flat surface using masking tape or a custom jig.
2. Align the stencil with the PCB pads.
3. Apply a small amount of solder paste to one end of the stencil.
4. Use a squeegee or old credit card to spread the paste across the stencil at a 45-60 degree angle.
5. Carefully lift the stencil to reveal the applied solder paste.
Proper solder paste application is crucial for successful component placement and soldering. Take your time and ensure even coverage on all pads.
3. Component Placement
With the solder paste applied, it's time to place the SMT components on the board:
1. Use tweezers to carefully pick up each component.
2. Align the component with its corresponding pads on the PCB.
3. Gently place the component onto the solder paste.
4. Use a magnifying glass or microscope to verify correct placement and alignment.
Remember to work methodically and place components in a logical order, starting with larger components and moving to smaller ones.
4. Reflow Soldering
Once all components are placed, it's time to solder them to the board. For DIY SMT PCB assembly, you have two main options:
Option 1: Reflow Oven
If you have access to a reflow oven:
1. Place the assembled PCB into the reflow oven.
2. Set the temperature profile according to your solder paste specifications.
3. Start the reflow process and monitor the board.
4. Allow the board to cool slowly after the peak temperature is reached.
Option 2: Hot Air Rework Station
For those without a reflow oven:
1. Set your hot air rework station to the appropriate temperature (usually around 350°C).
2. Hold the nozzle about 1-2 inches above the PCB.
3. Move the hot air in a circular motion over the board, focusing on areas with components.
4. Watch for the solder paste to melt and form connections.
5. Once all joints are reflowed, remove the heat and allow the board to cool naturally.

5. Inspection and Testing
After the reflow process, it's crucial to inspect your work:
1. Use a magnifying glass or microscope to check for proper solder joints.
2. Look for any bridging between pads or insufficient solder.
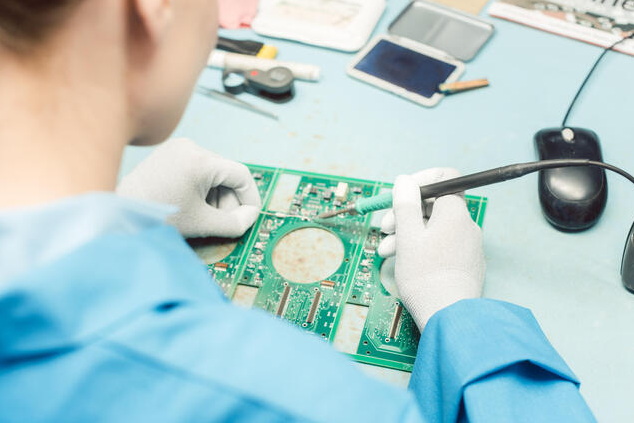
3. Test continuity using a multimeter to ensure proper connections.
4. Power up the board and test its functionality.
If you find any issues, you may need to touch up certain joints using a soldering iron or remove and replace components using your hot air rework station.
Advanced Techniques for DIY SMT PCB Assembly
As you become more comfortable with basic SMT assembly, you can explore more advanced techniques:
Double-Sided PCB Assembly
For more complex projects, you may need to assemble components on both sides of the PCB. This requires careful planning:
1. Apply solder paste and place components on the bottom side first.
2. Perform reflow soldering on the bottom side.
3. Flip the board and repeat the process for the top side.
4. Use kapton tape to protect bottom-side components during top-side reflow.
Fine-Pitch Components
Working with fine-pitch ICs and BGAs (Ball Grid Arrays) can be challenging but is achievable with practice:
1. Use a finer stencil for more precise solder paste application.
2. Consider using a pick-and-place machine for accurate component placement.
3. Employ X-ray inspection for checking BGA solder joints.
Mixed Technology Boards
Some projects may require a combination of SMT and through-hole components:
1. Assemble and solder SMT components first.
2. Insert through-hole components and hand-solder or wave-solder as needed.
Troubleshooting Common DIY SMT PCB Issues
Even with careful preparation, you may encounter issues during the DIY SMT PCB assembly process. Here are some common problems and solutions:
Solder Bridging
- Cause: Excess solder paste or component misalignment.
- Solution: Use a soldering iron with a fine tip to remove excess solder, or reflow the area with a hot air station.
Tombstoning
- Cause: Uneven heating or solder paste application.
- Solution: Ensure even solder paste application and uniform heating during reflow.
Cold Solder Joints
- Cause: Insufficient heat during reflow.
- Solution: Increase reflow temperature or duration, or touch up with a soldering iron.
Component Misalignment
- Cause: Poor placement or movement during reflow.
- Solution: Carefully remove the component, clean the pads, and re-solder with proper alignment.
Best Practices for Successful DIY SMT PCB Assembly
To increase your chances of success when creating DIY SMT PCBs, consider the following best practices:
1. Start with simple designs and gradually increase complexity as you gain experience.
2. Keep your work area clean and well-lit to minimize contamination and improve visibility.
3. Invest in quality tools, especially tweezers and a good magnification system.
4. Practice proper ESD (Electrostatic Discharge) protection to avoid damaging sensitive components.
5. Document your process and learn from each project to improve your skills over time.
The Future of DIY SMT PCB Assembly
As technology advances, DIY SMT PCB assembly is becoming more accessible to hobbyists and small-scale manufacturers. Emerging trends include:
- Desktop pick-and-place machines for more precise component placement
- Affordable desktop reflow ovens with advanced temperature profiling
- Improved software for PCB design and assembly planning
- 3D-printed jigs and fixtures for more efficient assembly processes
These advancements are making it easier than ever for enthusiasts to create professional-quality SMT PCBs at home or in small workshops.
Conclusion
Creating DIY SMT PCBs is a rewarding process that allows electronics enthusiasts to produce sophisticated and compact circuit boards. By following the key steps outlined in this guide – from PCB design and preparation to solder paste application, component placement, and reflow soldering – you can successfully assemble your own SMT PCBs. Remember to start with simple projects, invest in the right tools, and practice proper techniques to improve your skills over time. With patience and persistence, you'll be able to tackle increasingly complex SMT projects and bring your electronic ideas to life.

FAQ
1. What is the minimum component size I can work with for DIY SMT PCB assembly?
For DIY SMT PCB assembly, it's generally recommended to start with components no smaller than 0603 (1.6mm x 0.8mm) for resistors and capacitors, and SOIC or TSSOP packages for ICs. As you gain experience and improve your tools and techniques, you can work with smaller components like 0402 or even 0201, but these require more precision and specialized equipment.
2. How do I choose the right solder paste for my DIY SMT PCB project?
When selecting solder paste for DIY SMT PCB assembly, consider the following factors:
- Lead-free vs. leaded (most hobbyists use lead-free for safety and environmental reasons)
- Melting temperature (choose one that matches your reflow method)
- Particle size (finer particles are better for smaller components)
- Flux type (no-clean flux is convenient for hobbyists)
A popular choice for DIY projects is SAC305 lead-free solder paste with no-clean flux.
3. Can I use a regular oven for reflow soldering in DIY SMT PCB assembly?
While it's possible to use a regular kitchen oven for reflow soldering, it's not recommended for several reasons:
- Lack of precise temperature control
- Uneven heating
- Risk of contamination with food particles
- Potential release of harmful fumes
It's safer and more effective to use a dedicated reflow oven or a hot air rework station for DIY SMT PCB assembly.
4. How do I handle static-sensitive components during DIY SMT PCB assembly?
To protect static-sensitive components during DIY SMT PCB assembly:
- Use an anti-static wrist strap connected to a grounded surface
- Work on an ESD-safe mat
- Store components in anti-static bags or containers
- Use anti-static tweezers for handling components
- Maintain proper humidity levels in your work area (40-60% relative humidity)
These precautions will help prevent damage to sensitive SMT components from electrostatic discharge.
5. What are the most common mistakes to avoid in DIY SMT PCB assembly?
Some common mistakes to avoid in DIY SMT PCB assembly include:
- Using too much or too little solder paste
- Misaligning components during placement
- Overheating components during reflow
- Neglecting proper cleaning and inspection
- Rushing through the assembly process
Take your time, double-check your work, and follow best practices to achieve the best results in your DIY SMT PCB projects.
Citations:
[1] https://www.bestpcbs.com/blog/2024/08/how-to-make-smt-what-is-smt-process/
[2] https://www.viasion.com/blog/smt-manufacturing-process-step-by-step-guide/
[3] https://www.viasion.com/blog/guide-to-smt-and-pcb-assembly-techniques/
[4] https://www.viasion.com/blog/ultimate-guide-to-pcb-smt-assembly-process/
[5] https://www.pic-control.com/diy-surface-mount-soldering-and-pcb-assembly/
[6] https://www.pcbonline.com/blog/smt-manufacturing-process.html
[7] https://www.instructables.com/How-to-Assemble-a-Printed-Circuit-Board-PCB/
[8] https://www.wevolver.com/article/smt-process
[9] https://www.cirexx.com/pcb-design-steps/
[10] https://resources.altium.com/p/complete-guide-diy-smt-assembly-your-office
[11] https://blogs.sw.siemens.com/valor-dfm-solutions/how-to-optimize-pcb-design-for-the-smt-assembly-process-flow/


