Content Menu
● Understanding Surface Mount Technology
● Essential Tools for SMD Soldering
● Best Practices for Soldering Surface Mount Devices
>> Preparing the PCB
>> Component Placement
>> Soldering Techniques
>> Inspecting Solder Joints
>> Cleaning Up
● Common Challenges in SMD Soldering
● Conclusion
● Related Questions
>> 1. What is the difference between SMD and through-hole technology?
>> 2. What tools are essential for SMD soldering?
>> 3. How can I prevent solder bridges when soldering SMD components?
>> 4. What are the signs of a good solder joint?
>> 5. How do I clean a PCB after soldering?
Surface Mount Device (SMD) technology has revolutionized the electronics industry by allowing for smaller, more efficient circuit designs. SMD soldering is a critical skill for anyone involved in electronics manufacturing or repair. This article will explore the best practices for soldering surface mount devices, ensuring reliable connections and high-quality results.

Understanding Surface Mount Technology
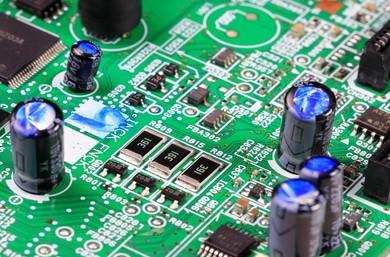
Surface Mount Technology (SMT) involves soldering components directly onto the surface of a printed circuit board (PCB). Unlike traditional through-hole technology, where components are inserted into holes in the PCB, SMT allows for a more compact design, which is essential for modern electronic devices. The advantages of SMT include:
- Reduced Size: Components are smaller and can be placed closer together.
- Improved Performance: Shorter connections reduce inductance and resistance.
- Automated Assembly: SMT is compatible with automated assembly processes, increasing production efficiency.
Essential Tools for SMD Soldering
Before diving into the soldering process, it's crucial to have the right tools. Here's a list of essential tools for effective SMD soldering:
1. Soldering Iron: A fine-tipped soldering iron is ideal for precision work.
2. Solder: Use a thin solder wire (0.5mm or smaller) with a rosin core.
3. Flux: Flux helps improve solder flow and adhesion.
4. Tweezers: Fine-tipped tweezers are necessary for handling small components.
5. Solder Wick: Useful for removing excess solder.
6. Hot Air Rework Station: For reflow soldering and desoldering components.
7. Magnifying Glass or Microscope: To inspect solder joints closely.
Best Practices for Soldering Surface Mount Devices
Preparing the PCB
Before soldering, ensure that the PCB is clean and free from contaminants. Use isopropyl alcohol and a lint-free cloth to clean the surface. Additionally, apply a small amount of solder paste to the pads where the components will be placed. This paste contains flux and solder, which will help create a strong bond.
Component Placement
Using tweezers, carefully place the SMD components onto the solder paste. Ensure that the components are aligned correctly with the pads. For larger components, it may be helpful to use a hot air rework station to preheat the area, making it easier to position the components accurately.

Soldering Techniques
There are several techniques for soldering SMD components:
- Hand Soldering: For small batches or repairs, hand soldering with a soldering iron is effective. Heat one pad and then the lead of the component, allowing the solder to flow.
- Hot Air Soldering: This method is excellent for larger components or when multiple pins need to be soldered simultaneously. Heat the area evenly until the solder melts, then allow it to cool.
- Reflow Soldering: For mass production, reflow soldering in an oven is the most efficient method. The solder paste is melted in a controlled environment, ensuring uniform solder joints.
Inspecting Solder Joints
After soldering, inspect each joint for quality. Look for the following characteristics of a good solder joint:
- Shiny Appearance: A shiny joint indicates good solder flow.
- Proper Fillet: The solder should form a smooth fillet around the component lead.
- No Bridges: Ensure there are no solder bridges between adjacent pads.
Cleaning Up
Once soldering is complete, clean the PCB to remove any residual flux. This can be done using isopropyl alcohol and a brush. Cleaning is essential to prevent corrosion and ensure the longevity of the circuit.
Common Challenges in SMD Soldering
Soldering SMD components can present several challenges, including:
- Component Misalignment: Ensure components are correctly aligned before soldering.
- Solder Bridges: Excess solder can create bridges between pads, leading to short circuits.
- Cold Joints: Insufficient heat can result in cold solder joints, which are weak and unreliable.
Conclusion
Soldering surface mount devices requires precision, practice, and the right tools. By following the best practices outlined in this article, you can achieve high-quality solder joints that ensure the reliability of your electronic devices. Whether you are a hobbyist or a professional, mastering SMD soldering is an invaluable skill in the electronics field.

Related Questions
1. What is the difference between SMD and through-hole technology?
SMD technology involves soldering components directly onto the surface of a PCB, while through-hole technology requires components to be inserted into holes in the PCB. SMD allows for smaller, more compact designs.
2. What tools are essential for SMD soldering?
Essential tools include a fine-tipped soldering iron, solder, flux, tweezers, solder wick, a hot air rework station, and a magnifying glass or microscope.
3. How can I prevent solder bridges when soldering SMD components?
To prevent solder bridges, use the appropriate amount of solder, ensure proper alignment of components, and inspect joints carefully after soldering.
4. What are the signs of a good solder joint?
A good solder joint should have a shiny appearance, a smooth fillet around the component lead, and no solder bridges between adjacent pads.
5. How do I clean a PCB after soldering?
Clean the PCB using isopropyl alcohol and a brush to remove any residual flux, which helps prevent corrosion and ensures the longevity of the circuit.


