Content Menu
● Understanding SMD Technology
● Essential Tools for SMD Soldering
● Step-by-Step Guide to Using an SMD Machine
>> Step 1: Preparing the PCB
>> Step 2: Placing Components
>> Step 3: Setting Up the SMD Rework Station
>> Step 4: Soldering Process
>> Step 5: Final Inspection
● Common Mistakes to Avoid
● Advanced Techniques in SMD Soldering
● Best Practices for Successful SMD Assembly
>> 1. Design Considerations:
>> 2. Testing Your Work:
>> 3. Regular Maintenance of Equipment:
● Conclusion
● FAQ
>> 1. What is an SMD machine?
>> 2. How do I choose the right temperature for my SMD machine?
>> 3. Can I use a regular soldering iron instead of an SMD machine?
>> 4. How do I prevent overheating my PCB during soldering?
>> 5. What should I do if I make a mistake while placing components?
● Citations:
Surface Mount Technology (SMT) has revolutionized the way electronic components are soldered onto printed circuit boards (PCBs). The SMD (Surface Mount Device) machine is a critical tool in this process, enabling efficient and precise soldering of small electronic components. This article will provide a comprehensive guide on how to use an SMD machine effectively, covering essential tools, techniques, and best practices.

Understanding SMD Technology
SMD technology allows for the direct mounting of electronic components onto the surface of PCBs, eliminating the need for drilling holes. This method offers several advantages:
- Space Efficiency: SMD components are generally smaller than their through-hole counterparts, allowing for more compact designs.
- Automated Assembly: SMT facilitates automated assembly processes, improving production efficiency.
- Enhanced Performance: SMD devices often have better electrical performance due to shorter lead lengths.
Essential Tools for SMD Soldering
Before diving into the operation of an SMD machine, it is vital to gather the necessary tools:
- SMD Rework Station: This is the primary machine used for soldering and desoldering SMD components. It typically includes a hot air gun with adjustable temperature and airflow settings.
- Solder Paste: A mixture of solder and flux that is applied to the PCB pads before placing the components.
- Tweezers: Non-magnetic ESD tweezers are essential for handling small components without causing damage.
- Digital Microscope: A microscope helps in accurately placing tiny components on the PCB.
- Flux: Used to improve solder flow and prevent oxidation during soldering.
- Solder Wire: For hand soldering or touch-up work if needed.
Step-by-Step Guide to Using an SMD Machine
Step 1: Preparing the PCB
1. Inspect and Clean the PCB: Ensure that the PCB is free from dust, dirt, or oxidation. Use isopropyl alcohol and a lint-free cloth for cleaning.
2. Apply Solder Paste: Use a stencil to apply solder paste accurately on the pads where components will be placed. Ensure that each pad is adequately covered without excess paste spilling over.
3. Check Component Orientation: Before placing any components, refer to your schematic or layout to confirm their orientation and placement requirements.
Step 2: Placing Components
1. Use Tweezers for Placement: Carefully pick up each SMD component using tweezers and place it onto the corresponding pads on the PCB. Ensure proper alignment with the pads.
2. Check Alignment with Microscope: Utilize a digital microscope to verify that all components are correctly positioned before proceeding to soldering.
3. Pre-tinning Pads (Optional): For certain components, pre-tinning one pad can help secure them in place as you solder the other side[1].
Step 3: Setting Up the SMD Rework Station
1. Turn On the Machine: Plug in your SMD rework station and turn it on.
2. Adjust Temperature and Airflow: Set the temperature between 300°C to 350°C (572°F to 662°F) and adjust airflow based on component size and type. A lower airflow setting is recommended for smaller components to prevent them from being blown away[2].
3. Select Nozzle Size: Choose an appropriate nozzle size for your hot air gun based on the component size; smaller nozzles are better for tiny parts[3].
Step 4: Soldering Process
1. Heat Application: Position the hot air gun above the component without touching it. Move it in a circular motion to evenly distribute heat around the component until you see the solder paste melt.
2. Observe Changes: Watch for changes in appearance as the solder paste transitions from a solid state to a liquid state, indicating that it is ready to bond with the component leads.
3. Cooling Down: Once soldering is complete, allow the board to cool naturally before handling it further[4].

Step 5: Final Inspection
1. Inspect Connections: After cooling, check all connections using a digital multimeter to ensure there are no short circuits or open connections.
2. Clean Excess Flux: If necessary, clean any residual flux from the board using PCB cleaning liquid or isopropyl alcohol[5].
Common Mistakes to Avoid
- Overheating Components: Always monitor temperature settings closely; overheating can damage sensitive components.
- Insufficient Cleaning: Failing to clean PCBs properly can lead to poor solder joints and unreliable connections.
- Improper Paste Application: Applying too much or too little solder paste can cause bridging or insufficient connections respectively[6].
Advanced Techniques in SMD Soldering
To further enhance your skills in using an SMD machine, consider these advanced techniques:
- Using Stencils for Paste Application: Utilizing an SMT stencil can significantly improve paste application accuracy by ensuring uniform coverage across all pads[7].
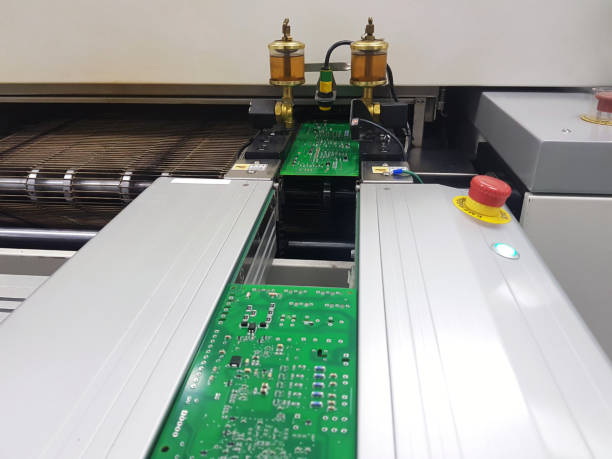
- Reflow Oven Usage: For larger batches of PCBs, consider using a reflow oven instead of a hot air gun for more consistent results across multiple boards[8].
- Desoldering Techniques: Mastering desoldering methods is equally important; use desoldering braid or a vacuum pump to remove excess solder or faulty components without damaging surrounding pads[9].
Best Practices for Successful SMD Assembly
1. Design Considerations:
- When designing PCBs for SMT assembly, ensure that trace widths are adequate for current ratings and that pad sizes match component leads precisely.
- Optimize component placement on your layout to minimize trace lengths and improve signal integrity[10].
2. Testing Your Work:
- After assembly, perform thorough testing including visual inspections under magnification and continuity tests with a multimeter.
- Employ automated optical inspection (AOI) systems if available in your production environment for enhanced quality control[9].
3. Regular Maintenance of Equipment:
- Keep your rework station clean and regularly replace worn tips on your soldering iron.
- Ensure that your digital microscope remains calibrated for accurate inspections[3].
Conclusion
Using an SMD machine effectively requires understanding both the technology and proper techniques involved in soldering small electronic components onto PCBs. By following these steps and incorporating advanced techniques into your workflow, you can achieve high-quality solder joints that enhance your electronic projects' reliability and performance. With practice and attention to detail, mastering SMD soldering becomes an attainable skill for hobbyists and professionals alike.

FAQ
1. What is an SMD machine?
An SMD machine refers to equipment used for soldering surface mount devices onto printed circuit boards using techniques like hot air reflow or infrared heating.
2. How do I choose the right temperature for my SMD machine?
The ideal temperature typically ranges from 300°C to 350°C (572°F - 662°F), but always refer to component datasheets for specific temperature limits as some may be sensitive to heat.
3. Can I use a regular soldering iron instead of an SMD machine?
While it's possible, using a regular soldering iron can be less effective for small components due to difficulty in controlling heat distribution compared to hot air methods used in SMD machines.
4. How do I prevent overheating my PCB during soldering?
Monitor your temperature settings closely, use appropriate airflow settings, and avoid holding the hot air gun too close or stationary over one area of your PCB.
5. What should I do if I make a mistake while placing components?
If you misplace a component, gently reheat it with hot air until the solder melts again, allowing you to reposition it correctly before letting it cool down again.
Citations:
[1] https://whadda.com/a-beginners-guide-to-smd-soldering/
[2] https://www.electroniclinic.com/smd-soldering-tutorial-for-beginners-tips-tricks-smd-rework-station/
[3] https://www.linkedin.com/pulse/smd-soldering-equipment-complete-guide-tools-jayden-tooling-oagfc
[4] https://www.instructables.com/How-to-Solder-SMD-SMT-Components-With-a-Soldering-/
[5] https://www.instructables.com/SMD-SOLDERING-101-USING-HOT-PLATE-HOT-AIR-BLOWER-S/
[6] https://swimbi.com/smd-pcb-layout-tips-and-best-practices-for-efficient-design/
[7] https://www.youtube.com/watch?v=fYInlAmPnGo
[8] https://www.youtube.com/watch?v=CORLzDxDV4w
[9] https://vicoimaging.com/smd-and-smt-comprehensive-guide/
[10] https://eleshop.eu/knowledgebase/tips-smd-soldering/


