Content Menu
● Understanding SMT Components
>> Types of SMT Components
● Tools and Materials Needed
>> Essential Tools
>> Additional Tools
● Preparing for Soldering
>> Clean the PCB
>> Apply Flux
>> Position the Components
● Soldering Techniques
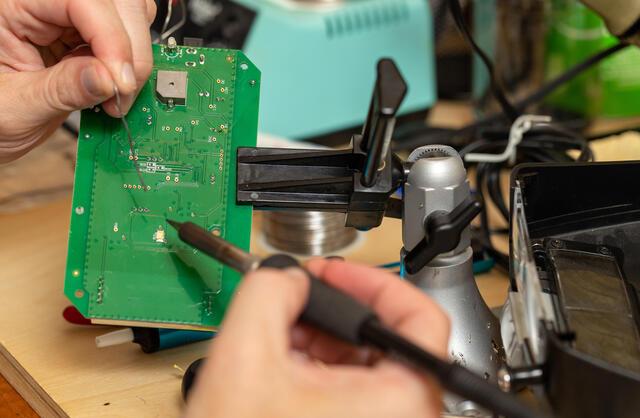
>> Hand Soldering
>> Hot Air Rework
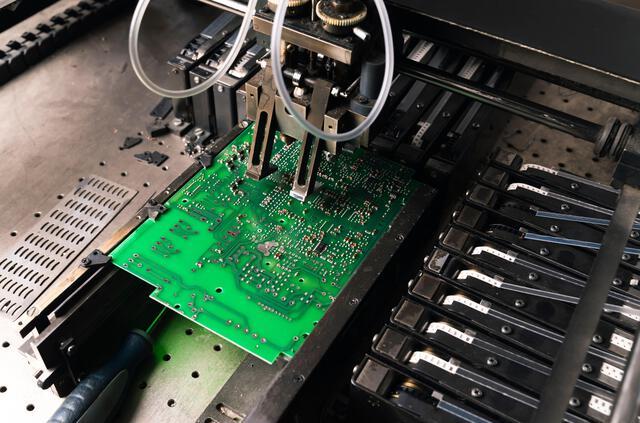
>> Reflow Soldering
● Troubleshooting Common Issues
>> Cold Joints
>> Bridging
>> Lifted Pads
● Best Practices for Soldering SMT Components
● Conclusion
● FAQ
>> 1. What is Surface Mount Technology (SMT)?
>> 2. What tools do I need for soldering SMT components?
>> 3. How do I prevent cold joints when soldering?
>> 4. Can I use lead-free solder for SMT?
>> 5. What should I do if I lift a pad while soldering?
Surface Mount Technology (SMT) has revolutionized the electronics industry by allowing for smaller, more efficient circuit designs. Soldering SMT components, however, can be challenging due to their tiny size and the precision required. This article will guide you through the process of soldering SMT components effectively, covering everything from preparation to troubleshooting common issues.

Understanding SMT Components
Before diving into the soldering process, it's essential to understand what SMT components are. Unlike traditional through-hole components, SMT components are mounted directly onto the surface of a printed circuit board (PCB). This technology allows for a higher density of components and a more compact design.
Types of SMT Components
- Resistors: These limit current flow and are available in various sizes. They can be either fixed or variable and are essential for controlling voltage and current in circuits.
- Capacitors: Used for storing electrical energy temporarily, capacitors come in various types such as ceramic, tantalum, and electrolytic, each serving different functions in electronic circuits.
- Integrated Circuits (ICs): These are complex components that can perform various functions, such as amplification, signal processing, or microcontroller tasks. They often contain multiple electronic components within a single package.
- Diodes: Allow current to flow in one direction only, diodes are crucial for protecting circuits from reverse polarity and for rectification processes.
- Transistors: Used for switching and amplification, transistors form the backbone of modern electronics, enabling complex operations in circuits.
Understanding these components will help you choose the right tools and techniques for soldering.
Tools and Materials Needed
To solder SMT components effectively, you will need specific tools and materials:
Essential Tools
- Soldering Iron: A fine-tipped soldering iron is ideal for SMT work. Temperature control is also important; look for an iron with adjustable settings.
- Solder: Use lead-free solder or traditional solder depending on your preference. Lead-free solder is commonly used due to health regulations but requires higher temperatures.
- Flux: This helps improve the flow of solder and prevents oxidation. Flux can be liquid or paste form; both types are effective.
- Tweezers: For handling small components. Precision tweezers with fine tips are recommended for better control.
- Magnifying Glass or Microscope: To see small details clearly. A magnifying lamp can provide both illumination and magnification.
Additional Tools
- Solder Wick: Useful for removing excess solder. It works by absorbing melted solder when placed over a joint.
- Hot Air Rework Station: For reflow soldering or desoldering components. This tool is particularly useful for larger arrays of SMT devices.
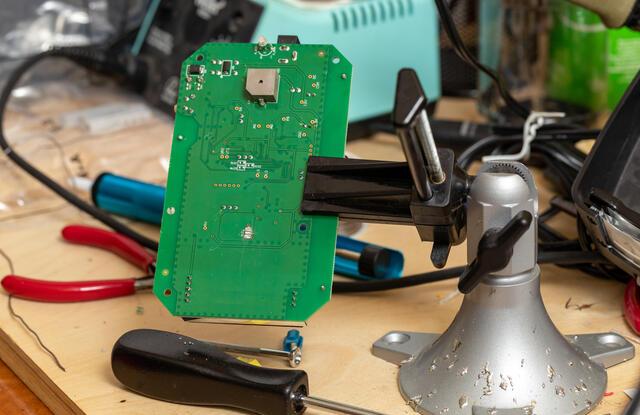
- PCB Holder or Vise: To keep your work steady. A good holder allows you to position the PCB at an ergonomic angle while you work.
Having the right tools will make the process easier and more efficient.
Preparing for Soldering
Preparation is key to successful soldering. Follow these steps to ensure a smooth process:
Clean the PCB
Before starting, make sure the PCB is clean. Dust or grease can prevent proper solder adhesion. Use isopropyl alcohol and a lint-free cloth to wipe down the board thoroughly. Ensure that any previous solder residue is also cleaned off to avoid contamination.
Apply Flux
Applying flux to the pads where you will be soldering helps improve solder flow. It also prevents oxidation, which can cause poor connections. Use a small brush or syringe to apply flux precisely where needed without excessive buildup.
Position the Components
Using tweezers, carefully place the SMT components onto their respective pads on the PCB. Ensure they are aligned correctly before proceeding to solder. If necessary, use a microscope to inspect alignment closely before committing to soldering.
Soldering Techniques
There are several techniques you can use when soldering SMT components. The choice of technique often depends on your experience level and the specific component being soldered.

Hand Soldering
1. Heat the Soldering Iron: Allow your iron to reach the appropriate temperature (around 350°C or 662°F). Make sure to clean the tip with a damp sponge before use to ensure good thermal conductivity.
2. Touch the Pad and Component Lead: Place the tip of the iron on both the pad and the component lead simultaneously. Ensure that both surfaces are heated adequately before adding solder.
3. Feed Solder into Joint: Once heated, feed solder into the joint while removing the iron smoothly. The solder should flow naturally into place; avoid adding too much at once.
4. Inspect the Joint: Check for a shiny, smooth connection that indicates a good joint. If it appears dull or grainy, you may need to reheat it carefully and add more solder if necessary.
Hot Air Rework
Hot air rework is particularly useful for larger arrays of SMT components or delicate parts:
1. Set Up Hot Air Station: Adjust temperature settings (typically around 250°C or 482°F). Select an appropriate nozzle size based on your component size; smaller nozzles provide more focused heat but require careful handling.
2. Apply Heat Evenly: Move the hot air nozzle in circular motions around the component until you see the solder melt. Be cautious not to overheat surrounding components as this can cause damage.
3. Let it Cool: Allow it to cool naturally; do not blow on it as this can create cold joints or misalignments in your components.
Reflow Soldering
Reflow soldering is commonly used in manufacturing but can be done at home with a toaster oven:
1. Place Components on PCB: Position your components with paste solder applied to pads using a stencil or syringe for precision application.
2. Heat in Toaster Oven: Set your oven to around 220°C (428°F) for a few minutes until you see solder flow visibly around all joints; this indicates proper melting and bonding has occurred.
3. Cool Down: Let it cool down gradually to avoid thermal shock which could crack components or pads on your PCB.
Troubleshooting Common Issues
Even experienced technicians encounter problems when soldering SMT components. Here are some common issues and their solutions:
Cold Joints
A cold joint appears dull and grainy instead of shiny; this often occurs when insufficient heat is applied during soldering or when movement occurs while cooling down. To fix this, reheat the joint carefully without adding new solder; ensure both surfaces are adequately heated before allowing them to cool again without disturbance.
Bridging
Bridging occurs when excess solder connects two adjacent pads, creating a short circuit between them. To resolve this issue, use a solder wick to soak up excess solder gently from between pads or apply heat with a hot air tool while using tweezers to separate them carefully if they have already bonded together unintentionally.
Lifted Pads
If a pad lifts off during soldering due to excessive heat or force applied during component placement, it may be challenging to repair effectively without damaging surrounding areas further. In such cases, use a small piece of wire or trace repair kit designed specifically for PCB repairs; these kits often include adhesive copper tape that can be used as an alternative connection method back onto traces leading away from lifted pads.
Best Practices for Soldering SMT Components
To achieve consistent results when soldering SMT components, consider these best practices:
- Always work in a well-lit area with good visibility; using additional task lighting helps illuminate small details better while working under magnification tools.
- Use anti-static equipment such as wrist straps or mats designed specifically for electronics workstations; this prevents damage from static electricity which could harm sensitive electronic parts.
- Practice on scrap boards before working on actual projects; gaining confidence through practice helps reduce mistakes when working on critical projects.
- Keep your tools clean and well-maintained for optimal performance; regularly clean tips of irons using damp sponges after each use ensures better heat transfer during subsequent jobs.
- Be patient! Rushing through any step increases chances of errors significantly leading towards frustrating outcomes rather than successful results achieved through careful attention paid throughout every stage involved within this intricate process!
Conclusion
Soldering SMT components may seem daunting at first, but with practice and patience, anyone can master this skill. By understanding your tools, preparing adequately, and employing effective techniques, you can create reliable electronic circuits that meet modern standards. Remember that troubleshooting is part of learning; embrace mistakes as opportunities for growth in your electronics journey.

FAQ
1. What is Surface Mount Technology (SMT)?
Surface Mount Technology is a method used to mount electronic components directly onto the surface of PCBs rather than inserting them through holes.
2. What tools do I need for soldering SMT components?
You will need a fine-tipped soldering iron, solder, flux, tweezers, magnifying glass or microscope, and possibly a hot air rework station depending on your technique preference.
3. How do I prevent cold joints when soldering?
To prevent cold joints, ensure that both the pad and component lead are heated adequately before adding solder. Practice using appropriate temperatures with your equipment.
4. Can I use lead-free solder for SMT?
Yes, lead-free solder is commonly used in electronics today due to health regulations and environmental concerns; however, it requires slightly higher temperatures than traditional leaded solders.
5. What should I do if I lift a pad while soldering?
If you lift a pad while working, try using wire or trace repair kits to reconnect it properly; otherwise, consult repair guides specific to your PCB type for further assistance.


