Content Menu
● Understanding SMD and SMT
● Tools Required for Soldering SMD Components
● Step-by-Step Guide to Soldering SMD Components
>> Step 1: Prepare Your Workspace
>> Step 2: Clean the PCB
>> Step 3: Apply Flux
>> Step 4: Tin One Pad
>> Step 5: Position the Component
>> Step 6: Heat the Joint
>> Step 7: Feed Solder
>> Step 8: Inspect Your Work
>> Step 9: Clean Up
● Advanced Techniques for Improved Soldering
● Tips for Successful Soldering
● Common Mistakes to Avoid
● Conclusion
● FAQ
>> 1. What is SMD soldering?
>> 2. What tools do I need for SMD soldering?
>> 3. How do I prevent overheating components?
>> 4. Can I use regular solder for SMD components?
>> 5. How do I fix a cold joint?
● Citations:
Soldering Surface Mount Devices (SMD) and Surface Mount Technology (SMT) components on a printed circuit board (PCB) is an essential skill for anyone involved in electronics. This process allows for the assembly of compact and efficient electronic devices. In this comprehensive guide, we will explore the tools required, the step-by-step soldering process, tips for successful soldering, common mistakes to avoid, and advanced techniques to enhance your soldering skills.

Understanding SMD and SMT
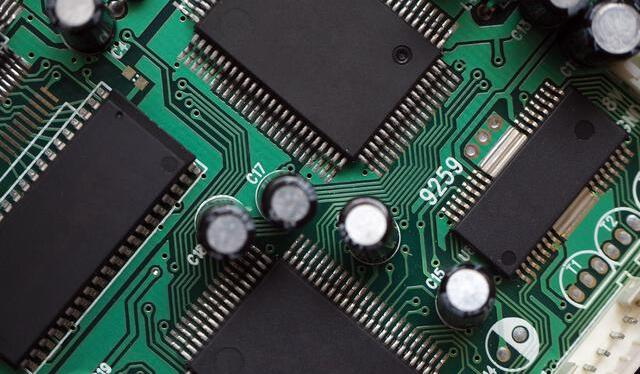
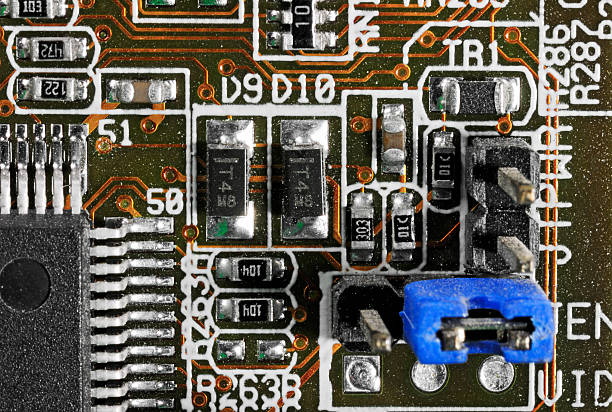
SMD refers to Surface Mount Devices, which are electronic components designed to be mounted directly onto the surface of PCBs. SMT, or Surface Mount Technology, is the method used to solder these components onto the PCB. Unlike traditional through-hole components that require holes in the PCB, SMD components are smaller and allow for a denser arrangement on the board.
The advantages of using SMDs include:
- Reduced Size: Smaller components allow for more compact designs.
- Increased Performance: Shorter leads reduce inductance and resistance, improving performance.
- Automated Assembly: SMT is compatible with automated assembly processes, reducing labor costs.
Tools Required for Soldering SMD Components
Before starting the soldering process, ensure you have the following tools:
- Soldering Iron: A fine-tipped soldering iron is essential for precision work. Consider using a temperature-controlled soldering station for better results.
- Solder: Use lead-free solder or traditional tin-lead solder depending on your preference and local regulations. Lead-free solder typically has a higher melting point.
- Flux: Flux helps improve solder flow and adhesion. It can be in liquid or paste form.
- Tweezers: Fine-tipped tweezers are necessary for handling small components. Anti-static tweezers are recommended to avoid damaging sensitive parts.
- Magnifying Glass or Microscope: This aids in seeing small components clearly, especially when working with very tiny parts.
- Solder Wick or Desoldering Pump: Useful for correcting mistakes by removing excess solder.
- Isopropyl Alcohol: For cleaning the PCB after soldering.
- PCB Holder or Vise: A holder keeps your PCB stable while you work, allowing for better precision.
Step-by-Step Guide to Soldering SMD Components
Step 1: Prepare Your Workspace
Ensure that your workspace is clean and well-lit. Gather all your tools and materials before starting. A stable surface will help prevent accidents. Make sure to work in an area free from static electricity to protect sensitive components.
Step 2: Clean the PCB
Before applying any components, clean the PCB with isopropyl alcohol to remove any dust or grease that may affect solder adhesion. A clean surface ensures better electrical connections and reduces the risk of defects.
Step 3: Apply Flux
Apply a small amount of flux to each pad where you will place an SMD component. This step is crucial as it helps prevent oxidation and ensures a clean joint. Flux also helps the solder flow more easily around the component leads during heating.
Step 4: Tin One Pad
Using your soldering iron, apply a small amount of solder to one of the pads of the component. This creates a “tack” that will hold the component in place. Tinning one pad first allows you to position the component accurately without it shifting during subsequent steps.
Step 5: Position the Component
Using tweezers, carefully place the SMD component onto the fluxed pads on the PCB. Ensure it aligns properly with the pads. Take your time during this step as misalignment can lead to difficulties later on.
Step 6: Heat the Joint
With one hand holding the soldering iron, touch it to the pad where you applied solder while simultaneously holding the component in place with tweezers. The heat will melt the solder, allowing it to flow around the lead of the component. Be careful not to apply too much heat for too long as this can damage both the component and PCB.
Step 7: Feed Solder
Once you see that the solder has melted and adhered to both pad and component lead, remove the iron but keep holding the component in place until it cools slightly. For additional joints, repeat this process for each pin of the component. If using a larger component with multiple pins, consider working from one side to another systematically.

Step 8: Inspect Your Work
After all pins are soldered, inspect each joint carefully with a magnifying glass. Look for any bridges (unwanted connections between pads) or cold joints (poorly formed connections). A good joint should have a shiny appearance and should be well-defined without excess solder spilling over onto adjacent pads.
Step 9: Clean Up
Once satisfied with your work, clean any residual flux from the board using isopropyl alcohol and a lint-free cloth. This prevents corrosion over time and ensures that your device operates correctly without interference from flux residues.
Advanced Techniques for Improved Soldering
As you become more comfortable with basic SMD soldering techniques, consider incorporating some advanced methods:
- Reflow Soldering: This technique involves applying paste flux and then placing components before heating them all at once using an oven or hot air tool. It's particularly useful for assembling multiple components simultaneously.
- Hot Air Rework Station: Using hot air can help in both soldering new components and desoldering existing ones without direct contact from a soldering iron.
- Solder Paste Application: For larger projects or production runs, using solder paste can streamline assembly by allowing multiple connections to be made at once before reflowing.
Tips for Successful Soldering
- Practice Makes Perfect: Start with simpler components before moving on to more complex ones. Consider practicing on scrap PCBs before working on actual projects.
- Use Proper Technique: When heating a joint, touch only the pad and lead; do not apply solder directly to the iron tip as this can create poor connections.
- Be Patient: Allow time for each joint to cool before moving on to ensure a solid connection. Rushing can lead to mistakes that may require rework.
- Keep Your Tools Clean: Regularly clean your soldering iron tip and workspace to avoid contamination which can affect performance.
Common Mistakes to Avoid
- Overheating Components: Prolonged heat can damage sensitive components; work quickly but carefully. Use lower temperatures when possible if working with delicate parts.
- Insufficient Flux Application: Not using enough flux can lead to poor solder flow which may result in weak joints or cold joints that do not conduct electricity properly.
- Misalignment of Components: Ensure proper alignment before soldering; misaligned components can be difficult to adjust once soldered and may require desoldering efforts that could damage other parts of your PCB.
Conclusion
Soldering SMD components on PCBs may seem daunting at first, but with practice and attention to detail, anyone can master this essential skill. By following proper techniques and using appropriate tools, you can create reliable electronic assemblies that are both compact and efficient. Remember that practice is key; start with simpler projects and gradually work your way up to more complex assemblies. With time, you'll develop confidence in your abilities as well as an understanding of how different components interact within your designs.

FAQ
1. What is SMD soldering?
SMD soldering involves attaching surface mount devices directly onto printed circuit boards using specific techniques that differ from traditional through-hole soldering.
2. What tools do I need for SMD soldering?
You will need a fine-tipped soldering iron, solder (lead-free or tin-lead), flux, tweezers, magnifying glass or microscope, desoldering pump or wick, isopropyl alcohol for cleaning, and optionally a PCB holder or vise for stability during work.
3. How do I prevent overheating components?
To prevent overheating, work quickly but carefully; allow each joint to cool before moving on to avoid damaging sensitive parts like integrated circuits (ICs).
4. Can I use regular solder for SMD components?
Yes, you can use regular solder; however, lead-free options are recommended due to health regulations in many areas as well as environmental considerations.
5. How do I fix a cold joint?
If you suspect a cold joint (a weak connection), reheat it gently with your soldering iron until it flows properly again; add more solder if necessary for good conductivity.
Citations:
[1] https://www.youtube.com/watch?v=T_TOG11sYAs
[2] https://www.instructables.com/Soldering-tiny-SMD-components-the-easy-and-fast-wa/
[3] https://www.youtube.com/watch?v=fYInlAmPnGo
[4] https://www.aixuntech.com/newsinfo/stepbystep-surface-mount-soldering-tutorial-for-beginners/
[5] https://www.nutsvolts.com/magazine/article/how_to_surface_mount_soldering
[6] https://www.build-electronic-circuits.com/smd-soldering/
[7] https://content.instructables.com/F0B/OI81/J7UQSBC0/F0BOI81J7UQSBC0.jpg?auto=webp&sa=X&ved=2ahUKEwi5zpSEpKuKAxV1CDQIHVhuHCYQ_B16BAgKEAI
[8] https://www.youtube.com/watch?v=EW9Y8rDm4kE
[9] https://www.youtube.com/watch?v=tSRLDsQgBok
[10] https://eleshop.eu/knowledgebase/tips-smd-soldering/


