Content Menu
● Understanding SMT Components
>> Common Types of SMT Components
● Tools Required for Removing SMT Components
● Preparation Steps Before Removal
>> 1. Gather Your Tools
>> 2. Power Down the Device
>> 3. Identify the Component
>> 4. Clean the Area
>> 5. Document the Current Setup
● Methods for Removing SMT Components
>> Method 1: Using a Soldering Iron
>> Method 2: Using Hot Air Rework Station
>> Method 3: Using a Soldering Iron with Preheating
>> Best Practices During Removal
● Post-Removal Steps
>> 1. Inspect PCB Pads
>> 2. Clean Up Solder Residue
>> 3. Prepare for New Component Installation
● Troubleshooting Common Issues
>> Lifted Pads
>> Excessive Heat Damage
>> Incomplete Solder Removal
● Conclusion
● FAQ
>> 1. What is Surface Mount Technology (SMT)?
>> 2. Can I remove SMT components without special tools?
>> 3. What should I do if I damage a pad while removing an SMT component?
>> 4. Is it safe to use a hot air rework station at home?
>> 5. How can I practice removing SMT components?
Surface Mount Technology (SMT) components are widely used in modern electronic devices due to their compact size and efficiency. However, there are times when you may need to remove these components, whether for repair, replacement, or rework. This article will provide a comprehensive guide on how to effectively and safely remove SMT components from printed circuit boards (PCBs).

Understanding SMT Components
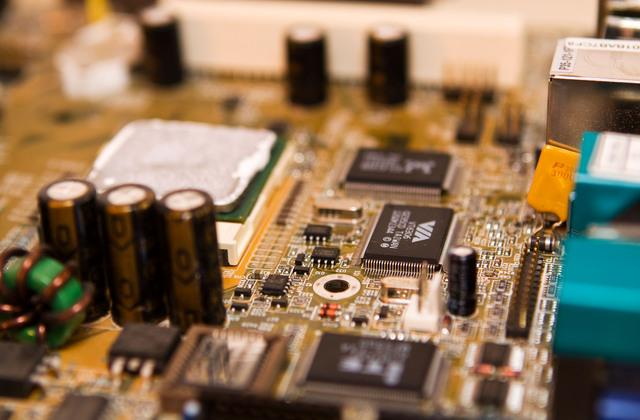
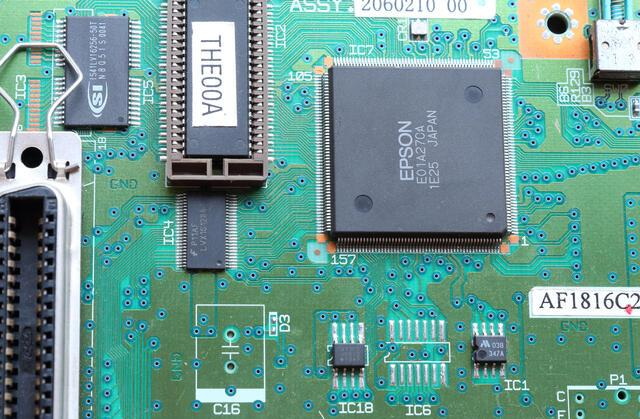
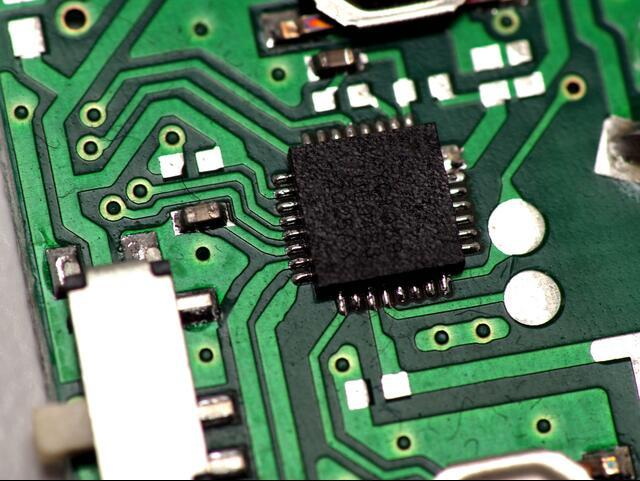
Before diving into the removal process, it's essential to understand what SMT components are. These components are mounted directly onto the surface of PCBs, as opposed to traditional through-hole components that require holes in the board. SMT components include resistors, capacitors, integrated circuits (ICs), and more. Their small size allows for higher circuit density and improved performance.
Common Types of SMT Components
- Resistors: Used to limit current flow.
- Capacitors: Store electrical energy temporarily.
- Integrated Circuits (ICs): Complex components that perform various functions.
- Diodes: Allow current to flow in one direction only.
- Inductors: Store energy in a magnetic field.
Tools Required for Removing SMT Components
To successfully remove SMT components, you will need the following tools:
- Soldering Iron: A fine-tipped soldering iron is essential for precise work.
- Solder Wick: Also known as desoldering braid, it helps absorb excess solder.
- Desoldering Pump: A mechanical tool used to suck up molten solder.
- Tweezers: For handling small components safely.
- Flux: Helps improve solder flow and adhesion.
- Hot Air Rework Station: Useful for removing larger components or multiple components at once.
- Magnifying Glass or Microscope: To closely inspect small components and solder joints.
- ESD Safe Mat and Wrist Strap: To prevent electrostatic discharge that could damage sensitive electronic parts.
Preparation Steps Before Removal
1. Gather Your Tools
Ensure you have all the necessary tools within reach. This will make the process smoother and more efficient.
2. Power Down the Device
Always ensure that the device is powered down and unplugged before attempting any repairs. This prevents electrical shock and damage to the PCB.
3. Identify the Component
Carefully inspect the PCB to identify which component needs to be removed. Take note of its orientation and position on the board.
4. Clean the Area
Use isopropyl alcohol and a lint-free cloth to clean the area around the component. This removes any dirt or debris that could interfere with the removal process.
5. Document the Current Setup
Before removing any component, take pictures or make notes about the component's placement and orientation on the PCB. This documentation can be invaluable when reinstalling new parts.
Methods for Removing SMT Components
There are several methods for removing SMT components from PCBs. The choice of method often depends on the size of the component and your available tools.
Method 1: Using a Soldering Iron
This method is suitable for smaller components such as resistors and capacitors.
1. Heat the Soldering Iron: Set your soldering iron to an appropriate temperature (around 350°C).
2. Apply Flux: Apply a small amount of flux to the joints of the component you wish to remove.
3. Heat the Solder Joints: Place the tip of the soldering iron on one of the solder joints until it melts.
4. Remove Solder with a Pump or Wick:
- If using a desoldering pump, quickly press it against the joint as soon as you see the solder melt.
- If using solder wick, place it over the joint and then place your soldering iron on top of it. The wick will absorb the melted solder.
5. Repeat for All Joints: Repeat this process for all joints connected to the component.
6. Lift Off Component: Once all solder has been removed, gently lift off the component using tweezers.
Method 2: Using Hot Air Rework Station
This method is more effective for larger components or when multiple components need removal simultaneously.
1. Set Up Hot Air Station: Set your hot air rework station to an appropriate temperature (around 250°C) and adjust airflow settings.
2. Apply Flux: Just like in Method 1, apply flux around the component's pins.
3. Heat Component: Use the hot air tool to evenly heat around the component until you see solder start to melt.
4. Remove Component: Once heated, use tweezers to gently lift off the component from the PCB.
5. Clean Up Residue: After removal, clean any remaining solder with a solder wick or desoldering pump.

Method 3: Using a Soldering Iron with Preheating
For particularly stubborn components or larger PCBs, preheating can be beneficial.
1. Preheat PCB: Use a preheating plate or hot air tool to warm up the PCB before applying heat directly to the component.
2. Follow Steps from Method 1 or Method 2: After preheating, proceed with either Method 1 or Method 2 as described above.
Best Practices During Removal
- Always work in a well-lit area to clearly see small components and connections.
- Use anti-static precautions such as an ESD wrist strap and mat to protect sensitive electronic parts from static discharge.
- Be patient; rushing can lead to mistakes or damage both to components and PCBs.
Post-Removal Steps
Once you have successfully removed an SMT component, follow these steps:
1. Inspect PCB Pads
Check if any pads have lifted from the PCB during removal. If so, they may need repair before installing a new component.
2. Clean Up Solder Residue
Use isopropyl alcohol and a brush or cloth to clean up any leftover solder or flux residue from the PCB surface.
3. Prepare for New Component Installation
If you plan to replace the removed component, ensure that you have a compatible replacement ready and that all pads are intact and clean.
Troubleshooting Common Issues
While removing SMT components can be straightforward, several common issues may arise:
Lifted Pads
If you notice pads lifting off with your component:
- Use a fine-tipped soldering iron to carefully reattach them if possible.
- If reattachment isn't feasible, consider using jumper wires or conductive adhesive as alternatives for connecting traces.
Excessive Heat Damage
Applying too much heat can damage surrounding components or even burn through traces:
- Always monitor your heat application closely.
- If using hot air tools, keep them moving rather than concentrating heat on one spot for too long.
Incomplete Solder Removal
If you find that some solder remains after attempting removal:
- Reapply heat while simultaneously using desoldering wick or pump until all solder is cleared away.
- Ensure that your tools are functioning correctly; sometimes replacing old wick or checking pump functionality can make a difference.
Conclusion
Removing SMT components requires precision and care but can be accomplished effectively with proper tools and techniques. Whether using a soldering iron or a hot air rework station, following these steps will help ensure successful removal without damaging your PCB. Always remember safety precautions during this process, including working in a well-ventilated area and wearing appropriate protective gear if necessary.
By understanding these methods and preparing adequately, you can tackle SMT component removal confidently, paving the way for repairs or upgrades in your electronic devices. Mastery of these techniques not only enhances your skills but also opens up opportunities for more complex electronic projects in your future endeavors.

FAQ
1. What is Surface Mount Technology (SMT)?
Surface Mount Technology (SMT) is a method where electronic components are mounted directly onto the surface of printed circuit boards (PCBs). It allows for smaller and more efficient designs compared to traditional through-hole technology.
2. Can I remove SMT components without special tools?
While it's possible to remove some SMT components without specialized tools, having proper equipment like a soldering iron, desoldering pump, or hot air rework station greatly increases your chances of success while minimizing damage to your PCB.
3. What should I do if I damage a pad while removing an SMT component?
If you damage a pad during removal, you can repair it by using conductive adhesive or by adding a wire jumper from one pad to another if necessary. In some cases, professional repair might be required depending on how critical that pad is for circuit functionality.
4. Is it safe to use a hot air rework station at home?
Yes, using a hot air rework station at home is safe as long as you follow safety guidelines such as working in well-ventilated areas and keeping flammable materials away from your workspace.
5. How can I practice removing SMT components?
To practice removing SMT components safely, consider using old or broken circuit boards where you can experiment without risk of damaging valuable equipment. This will help you gain experience before working on functional devices.


