Content Menu
● Understanding SMT Stencil Cutting and Its Importance
>> Why Optimize SMT Stencil Cutting?
● Key Factors to Optimize in SMT Stencil Cutting
>> 1. Choice of SMT Stencil Cutting Machine
>> 2. Material Selection for SMT Stencils
>> 3. Stencil Design Optimization
● SMT Stencil Cutting Process Optimization Techniques
>> 1. Laser Cutting Parameter Optimization
>> 2. Use of High Tension Foils and Frames
>> 3. Surface Treatments and Coatings
>> 4. Regular Maintenance and Cleaning
● Benefits of Optimized SMT Stencil Cutting
● Conclusion
● FAQ
>> 1. What is the best technology for SMT stencil cutting?
>> 2. How does stencil thickness affect solder paste printing?
>> 3. Why is aperture wall quality important in stencil cutting?
>> 4. What are the benefits of applying nano-coatings to SMT stencils?
>> 5. How often should SMT stencils be cleaned and inspected?
● Citations:
Surface Mount Technology (SMT) stencil cutting is a critical step in the electronics manufacturing process, directly impacting solder paste printing quality and, ultimately, the reliability and performance of printed circuit board (PCB) assemblies. Optimizing the SMT stencil cutting process can significantly improve print consistency, reduce defects, and enhance production efficiency. This comprehensive guide explores how to optimize your SMT stencil cutting process, focusing on the use of SMT stencil cutting machines, design considerations, manufacturing techniques, and maintenance best practices.

Understanding SMT Stencil Cutting and Its Importance
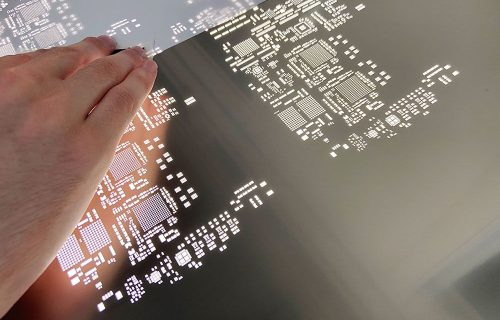
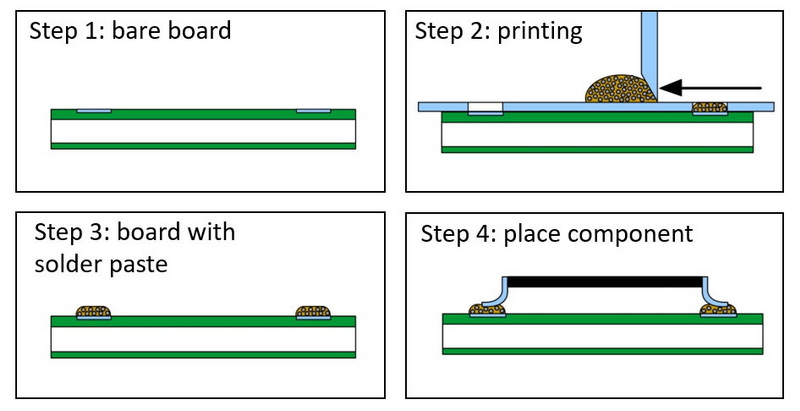
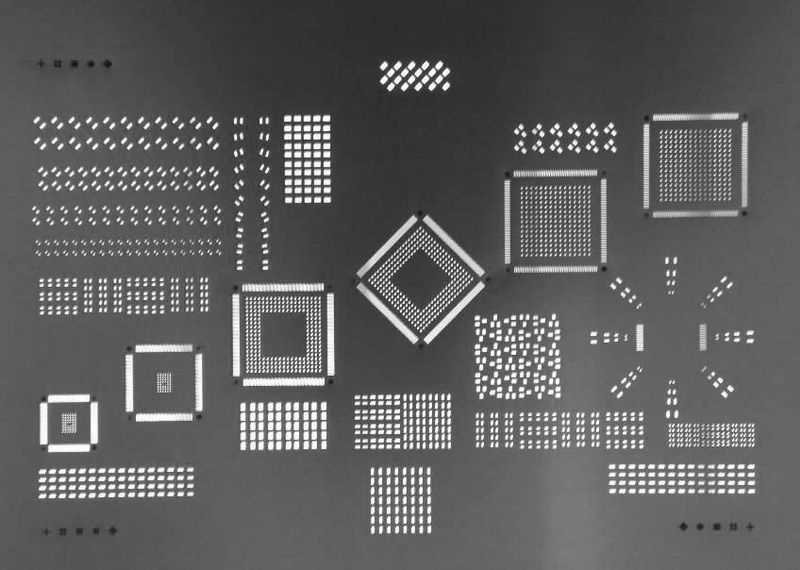
An SMT stencil is a thin sheet, typically made of stainless steel or nickel, with precisely cut apertures that correspond to the PCB pads where solder paste is deposited. The stencil cutting process involves creating these apertures with high accuracy and quality to ensure optimal solder paste volume and release during printing.
Why Optimize SMT Stencil Cutting?
- Print Quality: The stencil's aperture quality directly influences solder paste deposition accuracy, affecting solder joint reliability.
- Yield Improvement: Properly cut stencils reduce defects such as bridging, insufficient paste, or tombstoning.
- Production Efficiency: High-quality stencils reduce cleaning frequency and setup time, thereby increasing throughput.
- Cost Reduction: Minimizing rework and scrap lowers overall manufacturing costs.
The key to achieving these benefits lies in selecting the right materials, cutting technology, and process parameters for your SMT stencil cutting machine and stencil design.
Key Factors to Optimize in SMT Stencil Cutting
1. Choice of SMT Stencil Cutting Machine
The cutting machine is the cornerstone of stencil quality. Modern SMT stencil cutting machines predominantly use laser cutting technology due to its precision and flexibility.
- Laser Cutting Advantages:
- Produces the most accurate and repeatable apertures.
- Capable of fine geometries and high packing densities.
- Offers conical aperture walls and steep cutting edges that improve paste release.
- High cutting speeds with minimal thermal distortion.
- Machine Quality and Calibration:
- The age, maintenance, and calibration of the laser cutter affect cut quality.
- Newer machines feature fine laser beams, optical inspection, and on-board aperture measurement for Statistical Process Control (SPC).
- Regular calibration and tuning are essential to maintain consistent cutting performance.
When selecting or upgrading an SMT stencil cutting machine, inquire about its capabilities, maintenance history, and any optimization studies performed by the vendor to ensure top-notch stencil quality[1][2][5].
2. Material Selection for SMT Stencils
- Stainless Steel (SS):
- Most common due to durability and good print performance.
- Fine grain stainless steel is preferred for smoother aperture walls.
- Electropolishing and nickel plating can enhance surface smoothness and durability but may impact print performance differently.
- Nickel Foil:
- Laser-cut nickel stencils can offer higher accuracy than electroformed nickel.
- Nickel plating over stainless steel combines durability with precision but may not always outperform premium laser-cut stainless steel.
Material choice affects the cutting process parameters and final stencil performance, so it should align with PCB layout and production requirements[1][2].
3. Stencil Design Optimization
Optimizing stencil design is crucial before cutting:
- Stencil Thickness:
- Typical thickness ranges from 0.1 mm to 0.15 mm (4 to 6 mils).
- Thinner stencils suit fine-pitch components but may reduce paste volume.
- Thicker stencils provide more paste but can hinder paste release.
- Multiple thicknesses may be required for complex boards.
- Aperture Size and Shape:
- Aperture dimensions should slightly exceed pad size to compensate for paste shrinkage.
- Common shapes include round, square, rectangular, and home plate.
- Custom aperture designs (stepped, tapered) can improve paste release and volume control.
- Area and Aspect Ratios:
- Area ratio (aperture opening area to wall area) should be ≥ 0.66 for good paste release.
- Aspect ratio (aperture width to stencil thickness) should be optimized to prevent clogging and ensure transfer efficiency.
- Aperture Wall Quality:
- Smooth, burr-free walls improve paste release.
- Laser cutting parameters must be fine-tuned to minimize wall roughness and slag.
Design optimization should be done in conjunction with PCB layout review to improve yields and reduce costs[2][3][6][7].

SMT Stencil Cutting Process Optimization Techniques
1. Laser Cutting Parameter Optimization
Fine-tuning laser parameters such as power, speed, and focus improves aperture quality:
- Lower power and slower speeds can reduce burr formation.
- Optimized cutting reduces wall roughness, enhancing paste release.
- Some studies have shown that specific parameter sets can improve print yield and transfer efficiency significantly[1][8].
2. Use of High Tension Foils and Frames
- Applying higher tension (50+ N/cm) to the stencil foil reduces "snap back" and improves paste release.
- Requires more rigid frames and possibly harder steel to avoid warping.
- High tension stencils provide cleaner release and better print quality[2].
3. Surface Treatments and Coatings
- Electropolishing: Smooths microscopic imperfections on aperture walls, improving paste release and print consistency.
- Nano-coatings: Hydrophobic coatings reduce paste sticking, lower cleaning frequency, and extend stencil life.
- These treatments can increase print yields and reduce downtime for cleaning[2][4][6][8].
4. Regular Maintenance and Cleaning
- Implement scheduled cleaning to prevent aperture clogging and maintain print quality.
- Use appropriate solvents, ultrasonic cleaning, or automated cleaning systems.
- Inspect stencils regularly for damage or wear using magnification tools.
- Proper storage in clean, dry environments prevents damage and contamination[3][6].
Benefits of Optimized SMT Stencil Cutting
- Faster Setup and Alignment: Precision-cut stencils ease alignment, reducing setup time.
- Consistent Batch Results: Repeatable aperture quality ensures uniform solder paste deposition.
- Reduced Cleaning Frequency: Coated and polished stencils resist paste buildup.
- Improved Paste Transfer Efficiency (PTE): Better aperture quality leads to higher PTE, critical for fine-pitch components.
- Lower Rework Rates: Accurate paste volume reduces soldering defects and rework costs[4].
Conclusion
Optimizing your SMT stencil cutting process is essential for achieving superior solder paste printing quality, improving PCB assembly yields, and enhancing overall manufacturing efficiency. The process begins with selecting a high-quality SMT stencil cutting machine equipped with advanced laser technology, followed by careful stencil design tailored to your PCB layout. Fine-tuning laser cutting parameters, using appropriate materials, applying surface treatments, and maintaining strict cleaning and inspection protocols all contribute to better stencil performance. By investing in these optimizations, manufacturers can reduce defects, lower costs, and increase throughput, ensuring competitive advantages in the fast-evolving electronics industry.

FAQ
1. What is the best technology for SMT stencil cutting?
Laser cutting is the most precise and widely used technology for SMT stencil cutting due to its accuracy, ability to produce fine features, and high repeatability. It outperforms chemical etching and mechanical methods in most applications[1][5][6].
2. How does stencil thickness affect solder paste printing?
Stencil thickness determines the volume of solder paste deposited. Thinner stencils are better for fine-pitch components but may not deposit enough paste for larger pads. Thicker stencils increase paste volume but may reduce paste release efficiency. Selecting the right thickness depends on component size and PCB design[2][7].
3. Why is aperture wall quality important in stencil cutting?
Smooth and burr-free aperture walls ensure better solder paste release from the stencil during printing. Rough or damaged walls can cause paste sticking, resulting in inconsistent deposits and defects such as bridging or insufficient solder joints[1][2].
4. What are the benefits of applying nano-coatings to SMT stencils?
Nano-coatings improve stencil surface hydrophobicity, reducing solder paste sticking and buildup. This decreases cleaning frequency, extends stencil life, and enhances print yield and consistency[4][8].
5. How often should SMT stencils be cleaned and inspected?
Regular cleaning after a set number of prints (e.g., every 10 prints or sooner if paste buildup occurs) is recommended. Inspection for damage or clogging should be done routinely using magnification tools to maintain print quality and avoid defects[3][6][8].
Citations:
[1] https://www.circuitinsight.com/pdf/selecting_stencil_technologies_optimize_print_performance_ipc.pdf
[2] https://www.ipc.org/system/files/technical_resource/E38&S12-02%20-%20Chrys%20Shea.pdf
[3] https://rigidflexpcb.org/comprehensive-guide-to-smt-stencils/
[4] https://www.datumalloys.com/reduce-rework-with-high-precision-solder-paste-stencils/
[5] https://stencillaser.lpkf.com/en/technology/about-stencil-manufacturing
[6] https://pcbpit.com/smt-stencil-a-comprehensive-guide/
[7] https://www.ipc.org/system/files/technical_resource/E10&S33_02.pdf
[8] https://www.aculon.com/pdfs/SMTA-Shea-Whittier.pdf
[9] https://preserve.lehigh.edu/system/files/derivatives/coverpage/390477.pdf
[10] https://www.reddit.com/r/AskElectronics/comments/pk71xl/how_to_design_pcb_stencil_to_optimize_solder/
[11] https://www.smtfactory.com/Optimizing-Efficiency-Strategies-for-A-Smooth-SMT-Line-Production-Process-id47463586.html
[12] https://electronics.stackexchange.com/questions/295050/good-practice-when-designing-a-pcb-and-stencil
[13] https://www.circuitinsight.com/pdf/screen_printing_improve_paste_deposition_ipc.pdf
[14] https://www.globalspec.com/learnmore/material_handling_packaging_equipment/industrial_printing_equipment/stencil_machines
[15] https://www.surfacemountprocess.com/a-guide-to-effective-stencil-design.html
[16] https://www.lpkfusa.com/products-and-technologies/pcb-production-lasers/smt-stencil-cutting
[17] https://www.youtube.com/watch?v=WfyZK2GO3Sc
[18] https://iconnect007.com/article/189/improving-stencil-printing-results/192/pcb
[19] https://www.pentalogix.com/products/prototype-smt-stencils
[20] https://electronics.stackexchange.com/questions/101817/whats-a-good-plastic-for-self-cutting-solder-paste-stencils-on-a-laser


