Content Menu
● Understanding SMT PCB Assembly Stencils
● Why Proper Maintenance and Cleaning of SMT Stencils Matter
● Best Practices for Maintaining SMT PCB Assembly Stencils
>> Regular Inspection
>> Proper Handling and Storage
>> Optimize Cleaning Frequency
● Methods to Clean Stencil for SMT PCB Assembly
>> Manual Cleaning
>> Automatic Cleaning
● Choosing the Right Cleaning Solvents and Tools
● Additional Tips to Prolong SMT Stencil Life
● Troubleshooting Common Stencil Issues
● Conclusion
● FAQ
>> 1. How often should I clean the stencil for SMT PCB assembly?
>> 2. What are the best solvents to use for cleaning SMT stencils?
>> 3. Can ultrasonic cleaning damage SMT stencils?
>> 4. How should SMT stencils be stored to prevent damage?
>> 5. What tools are recommended for manual cleaning of SMT stencils?
Surface Mount Technology (SMT) PCB assembly stencils play a critical role in the electronics manufacturing process. These stencils are precision tools used to apply solder paste accurately onto printed circuit boards (PCBs), ensuring that components are correctly soldered during assembly. Maintaining and cleaning the stencil for SMT PCB assembly is essential to achieve consistent print quality, reduce defects, and prolong the stencil's lifespan. This comprehensive guide covers everything you need to know about maintaining and cleaning SMT stencils effectively.

Understanding SMT PCB Assembly Stencils
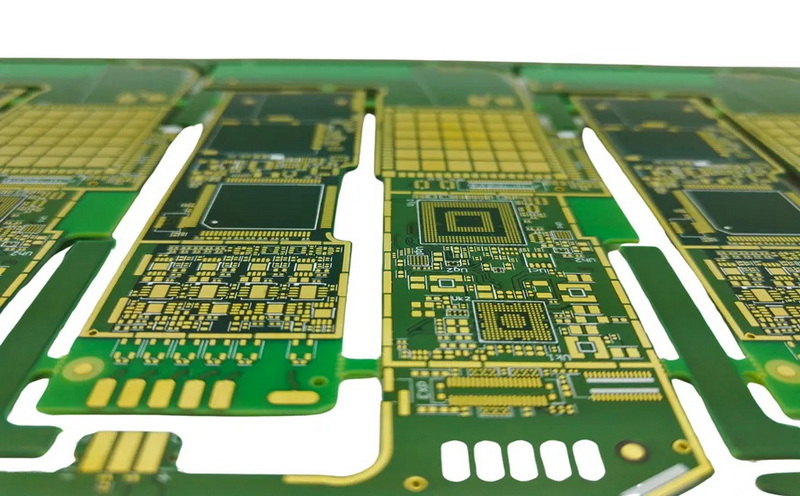
An SMT stencil is typically a thin sheet of stainless steel or other metal, laser-cut with apertures that match the PCB pads where solder paste must be applied. During assembly, solder paste is spread across the stencil with a squeegee, depositing paste only through the apertures onto the PCB. This process requires the stencil to be clean and free of any residual solder paste or contaminants to ensure precise paste deposition.
The stencil's aperture design and thickness are carefully chosen to control the volume of solder paste deposited, which directly influences solder joint quality. Fine-pitch components, BGA (Ball Grid Array), and other advanced packages require extremely precise stencil apertures and clean surfaces to avoid defects like insufficient solder, bridging, or tombstoning.
Why Proper Maintenance and Cleaning of SMT Stencils Matter
Maintaining and cleaning the stencil for SMT PCB assembly is crucial for several reasons:
- Prevents Print Defects: Residual solder paste clogging stencil apertures can cause insufficient or uneven solder paste deposits, leading to poor solder joints and assembly defects.
- Maintains Print Quality: Dust, flux residues, and other contaminants on the stencil surface reduce solder paste release efficiency and print consistency.
- Reduces Solder Balls and Bridging: Paste residues can cause solder balls and bridging, which affect assembly yield and reliability.
- Extends Stencil Lifespan: Regular cleaning and proper handling prevent corrosion, wear, and damage, prolonging the stencil's usable life.
- Ensures Process Stability: Consistent cleaning helps maintain repeatable print quality, which is vital for high-volume production and prototyping alike.
In addition, a well-maintained stencil minimizes downtime caused by cleaning or repair, allowing production lines to operate smoothly and cost-effectively.
Best Practices for Maintaining SMT PCB Assembly Stencils
Regular Inspection
Visual inspection is the first line of defense in stencil maintenance. Before and after each print cycle, operators should carefully examine the stencil for:
- Dried or hardened solder paste residues
- Flux buildup
- Debris or dust particles
- Aperture clogging or deformation
- Signs of corrosion or wear
Using magnification tools such as microscopes or magnifying lamps can help detect fine defects that are not visible to the naked eye. Early detection of issues allows for timely cleaning or repair, preventing print defects from affecting assembly quality.
Proper Handling and Storage
Handling and storage practices significantly impact stencil longevity and performance:
- Always handle stencils with clean, lint-free gloves to avoid transferring oils, dirt, or moisture.
- Avoid touching the stencil apertures directly.
- Store stencils vertically in dedicated racks or frames to prevent bending or warping.
- Keep stencils in a controlled environment with low humidity and stable temperature to prevent oxidation or corrosion.
- Use protective covers or cases when transporting stencils to avoid physical damage.
Proper handling and storage reduce the risk of mechanical damage and contamination, which are common causes of stencil failure.
Optimize Cleaning Frequency
The frequency of cleaning the stencil for SMT PCB assembly depends on various factors:
- Production Volume: Higher volumes generate more solder paste residue and require more frequent cleaning.
- Solder Paste Type: Some solder pastes dry faster or leave more residues, affecting cleaning intervals.
- Stencil Design: Fine-pitch and complex aperture patterns tend to clog more easily.
- Environmental Conditions: High humidity or dust levels can accelerate stencil contamination.
As a general guideline:
- For low-volume production (1-5 boards per day), clean the stencil after every print.
- For moderate volume (5-10 boards per day), clean after every 2-3 prints.
- For high-volume production (more than 10 boards per day), clean every 5-10 prints or as required based on observed print quality.
Monitoring print defects such as insufficient paste, bridging, or solder balls can also indicate when cleaning is necessary.

Methods to Clean Stencil for SMT PCB Assembly
There are two primary cleaning methods: manual cleaning and automatic cleaning. Each has its advantages and is suitable for different production scales and stencil conditions.
Manual Cleaning
Manual cleaning is often preferred for low-volume or prototype PCB assembly due to its flexibility and low cost.
Step-by-Step Manual Cleaning Procedure:
1. Visual Inspection: Examine the stencil underside and apertures for dried solder paste and debris.
2. Preparation: Wear lint-free gloves; place the stencil on an ESD-safe flat surface; prepare cleaning solvents and non-metallic swabs.
3. Loosen Dry Paste: Use adhesive tape to lift large chunks of dried paste; gently roll foam swabs soaked in solvent to loosen residues.
4. Clean Apertures: Use a soft brass brush dipped in solvent to gently clean inside apertures and edges.
5. Wipe Surfaces: Saturate lint-free wipes with solvent and wipe both stencil sides in single strokes; replace wipes when soiled.
6. Final Cleaning: Use lens cleaning tissue with solvent for a final clean to remove any remaining residues.
7. Drying: Allow the stencil to air dry or use compressed air to speed drying.
Advantages:
- Low initial cost
- Good for small batches and prototypes
- Visual control over cleaning quality
Disadvantages:
- Time-consuming
- Labor-intensive
- Cleaning quality depends on operator skill
- Risk of stencil damage from improper handling
Manual cleaning requires patience and care to avoid scratching or bending the stencil. It is essential to use the correct solvents and tools to prevent corrosion or damage to the delicate apertures.
Automatic Cleaning
Automatic cleaning methods are preferred for high-volume production due to efficiency and consistency.
Common Automatic Cleaning Techniques:
- Pneumatic Spray Cleaning: Uses compressed air and cleaning agents to spray and remove solder paste. It is effective and reduces manual labor.
- Ultrasonic Cleaning: Employs high-frequency sound waves in a cleaning solution to dislodge paste residues, especially effective for fine-pitch stencils.
- Automated Wet and Dry Cleaning Systems: Combine solvents, vacuum drying, and air jets for thorough cleaning with programmable cycles.
Automatic cleaning machines are designed to handle multiple stencils quickly, improving throughput in manufacturing environments.
Advantages:
- High cleaning efficiency and consistency
- Reduces labor costs and operator errors
- Suitable for complex and fine-pitch stencils
- Faster turnaround times
Disadvantages:
- Higher initial investment
- Some machines cannot accommodate oversized stencils
- Ultrasonic cleaning may cause wear over time if not properly managed
When using automatic cleaning, it is important to follow manufacturer guidelines for solvent use, cycle times, and maintenance to maximize stencil life.
Choosing the Right Cleaning Solvents and Tools
Selecting appropriate cleaning solvents and tools is critical to effective stencil maintenance:
- Solvents: Use cleanroom-grade solvents formulated to dissolve solder paste and flux residues without damaging the stencil material. Common solvents include isopropyl alcohol and specialized stencil cleaners.
- Tools: Use foam swabs, lint-free wipes, and soft brass brushes. Avoid abrasive materials that can scratch or deform the stencil.
- Tape: Adhesive tape can be used to lift large dried paste chunks without damaging apertures.
- Compressed Air: Use filtered, oil-free compressed air to dry the stencil after cleaning.
Regularly replace cleaning materials to avoid cross-contamination and ensure thorough cleaning.
Additional Tips to Prolong SMT Stencil Life
- Avoid Excessive Printing Pressure: Excessive squeegee pressure can deform stencil apertures and cause premature wear.
- Use Appropriate Stencil Thickness: Select stencil thickness based on PCB pad size and component type to optimize solder paste volume and release.
- Calibrate Equipment Regularly: Ensure stencil printers and cleaning machines are maintained and calibrated for consistent operation.
- Monitor Environmental Conditions: High humidity accelerates solder paste drying on the stencil, making cleaning more difficult. Maintain stable temperature and humidity in the production area.
- Implement a Cleaning Log: Track cleaning frequency, methods, and results to optimize maintenance schedules and detect recurring issues.
- Train Operators: Proper training ensures stencil handling and cleaning are performed correctly, reducing damage and improving print quality.
Troubleshooting Common Stencil Issues
Even with proper maintenance, issues can arise. Here are some common problems and solutions related to stencil cleaning and maintenance:
- Clogged Apertures: Often caused by dried solder paste or flux residues. Increase cleaning frequency and use ultrasonic cleaning for fine-pitch stencils.
- Solder Paste Bridging: Caused by excessive paste or incomplete cleaning. Adjust stencil thickness or aperture design and ensure thorough cleaning.
- Solder Balls: Residual paste particles on the stencil can cause solder balls. Clean stencil surfaces carefully and avoid contamination.
- Stencil Corrosion: Caused by moisture or improper solvents. Store stencils in dry conditions and use compatible cleaning agents.
- Stencil Warping or Bending: Improper handling or storage. Use dedicated racks and handle with care.
Conclusion
Maintaining and cleaning the stencil for SMT PCB assembly is a critical process that directly impacts the quality, yield, and reliability of electronic assemblies. Whether using manual or automatic cleaning methods, regular inspection, proper handling, and optimized cleaning frequency are essential to prevent print defects and extend stencil life. Investing in the right cleaning tools, solvents, and storage conditions further ensures consistent stencil performance. As PCB designs become more complex and production volumes increase, mastering stencil maintenance and cleaning will remain a cornerstone of efficient and high-quality SMT assembly.
By following the best practices outlined in this guide, manufacturers can reduce defects, improve production efficiency, and protect their investment in stencil tooling.

FAQ
1. How often should I clean the stencil for SMT PCB assembly?
The cleaning frequency depends on your production volume and solder paste type. For low volumes (1-5 boards/day), clean after every print. For higher volumes, clean every 2-10 prints as needed to maintain print quality.
2. What are the best solvents to use for cleaning SMT stencils?
Use cleanroom-grade solvents specifically formulated to dissolve solder paste without damaging the stencil material. Avoid harsh or abrasive chemicals.
3. Can ultrasonic cleaning damage SMT stencils?
Ultrasonic cleaning is effective but may cause wear if overused or improperly applied. It is best suited for fine-pitch stencils and should be used according to manufacturer recommendations.
4. How should SMT stencils be stored to prevent damage?
Store stencils in a clean, dry, and temperature-controlled environment. Keep them away from moisture, direct sunlight, and metal contact to avoid corrosion and physical damage.
5. What tools are recommended for manual cleaning of SMT stencils?
Use non-metallic foam swabs, soft brass brushes, lint-free wipes, and cleanroom-grade solvents. Avoid abrasive tools that can scratch or deform the stencil.


