Content Menu
● Understanding SMT and Its Advantages
● Planning Your First PCB SMT Prototype
>> Defining Project Requirements
>> Selecting Components
● Designing Your First PCB SMT Prototype
>> Schematic Design
>> PCB Layout
>> Design Verification
● Fabrication of Your First PCB SMT Prototype
>> Selecting a PCB Manufacturer
>> Preparing Files for Fabrication
● Assembly of Your First PCB SMT Prototype
>> Solder Paste Application
>> Component Placement
>> Reflow Soldering
● Testing and Debugging Your First PCB SMT Prototype
>> Visual Inspection
>> Electrical Testing
>> Debugging and Iteration
● Scaling Up: From Prototype to Production
● Conclusion
● FAQ
>> 1. What are the main advantages of SMT for my first PCB prototype?
>> 2. How do I choose the right components for my first PCB SMT prototype?
>> 3. What should I consider when designing the layout for my first PCB SMT prototype?
>> 4. How do I prepare my design files for fabrication of my first PCB SMT prototype?
>> 5. What steps should I take to test and debug my first PCB SMT prototype?
● Citations:
Surface Mount Technology (SMT) has revolutionized the electronics industry, allowing for smaller, more efficient, and cost-effective printed circuit boards (PCBs). For those embarking on their first PCB SMT prototyping journey, the process can seem daunting. However, with the right approach and understanding, you can successfully navigate this crucial step in product development. This comprehensive guide will walk you through the essential steps and considerations for your first PCB SMT prototyping project.

Understanding SMT and Its Advantages
Before diving into the prototyping process, it's crucial to understand what SMT is and why it's beneficial for your first PCB project. Surface Mount Technology involves mounting components directly onto the surface of a PCB, as opposed to through-hole technology where components are inserted through holes in the board[1].
The advantages of SMT for your first PCB prototype include:
1. Smaller component size, leading to more compact designs
2. Higher component density, allowing for more complex circuits in a smaller area
3. Improved performance due to shorter electrical paths
4. Lower production costs for medium to high-volume production
5. Better mechanical performance under shake and vibration conditions
These benefits make SMT an attractive option for your first PCB prototype, especially if you're aiming for a compact and efficient design.
Planning Your First PCB SMT Prototype
Defining Project Requirements
The first step in your SMT PCB prototyping journey is to clearly define your project requirements. This includes:
- Functionality: What is the purpose of your PCB?
- Size constraints: Are there any limitations on board dimensions?
- Power requirements: What voltage and current levels are needed?
- Environmental considerations: Will the PCB be exposed to extreme temperatures or humidity?
- Production volume: Is this a one-off prototype or a precursor to mass production?
By answering these questions, you'll have a solid foundation for your first PCB SMT prototype design.
Selecting Components
Choosing the right components is crucial for your first PCB SMT prototype. Consider the following:
- Package types: SMT components come in various package types (e.g., SOT, QFP, BGA). Choose packages that balance your design needs with your assembly capabilities.
- Availability: Ensure selected components are readily available to avoid delays.
- Cost: Balance performance with budget constraints.
- Thermal considerations: Some SMT components may require special thermal management.
When selecting components for your first PCB SMT prototype, it's often wise to stick with more common package types that are easier to work with, such as SOT-23 or SOIC packages[1].
Designing Your First PCB SMT Prototype
Schematic Design
The schematic is the blueprint of your circuit and forms the foundation of your first PCB SMT prototype. When creating your schematic:
1. Use appropriate SMT component symbols
2. Ensure all connections are properly defined
3. Label key signals and power distribution for easy reference
4. Group related components logically
Remember, a well-organized schematic will make the PCB layout process much smoother for your first SMT prototype[1].
PCB Layout
The PCB layout is where your first SMT prototype starts to take physical form. Key considerations include:
1. Component placement: Group related components and consider signal flow
2. Trace routing: Keep traces short and avoid right angles
3. Power and ground planes: Use copper pours for efficient power distribution
4. Thermal management: Consider heat dissipation for power-intensive components
5. Design for manufacturing (DFM): Follow design rules that ensure manufacturability
For your first PCB SMT prototype, it's advisable to use a 4-layer board. This provides separate layers for power, ground, and signal routing, making layout easier and improving signal integrity[1].
Design Verification
Before moving to fabrication, thoroughly verify your design:
1. Run Design Rule Checks (DRC) to catch any violations of manufacturing constraints
2. Perform electrical rule checks to ensure proper connectivity
3. Review component placement and orientation
4. Check for adequate clearances between components and board edges
Taking the time to verify your design can save significant time and cost in the long run, especially for your first PCB SMT prototype.
Fabrication of Your First PCB SMT Prototype
Selecting a PCB Manufacturer
Choosing the right manufacturer is crucial for your first PCB SMT prototype. Consider factors such as:
1. Capabilities: Ensure they can handle your design's complexity
2. Quality: Look for certifications like ISO 9001
3. Turnaround time: How quickly can they deliver your prototype?
4. Cost: Balance quality with your budget
5. Support: Do they offer design for manufacturing (DFM) feedback?
For your first PCB SMT prototype, it may be beneficial to choose a manufacturer that specializes in prototyping and offers guidance throughout the process[5].

Preparing Files for Fabrication
Once you've selected a manufacturer, you'll need to prepare your design files:
1. Generate Gerber files: These contain the PCB layout information
2. Create a drill file: This specifies hole locations and sizes
3. Produce a bill of materials (BOM): List all components with their specifications
4. Develop an assembly drawing: This guides the placement of components
Ensure all files are accurate and complete to avoid delays or errors in your first PCB SMT prototype fabrication[5].
Assembly of Your First PCB SMT Prototype
Solder Paste Application
The first step in SMT assembly is applying solder paste to the PCB:
1. Use a solder paste stencil aligned with the PCB
2. Apply solder paste evenly across the stencil
3. Remove the stencil carefully to avoid smearing
For your first PCB SMT prototype, you might consider using a manual stencil printer for more control over the process[2].
Component Placement
Next, place the SMT components onto the PCB:
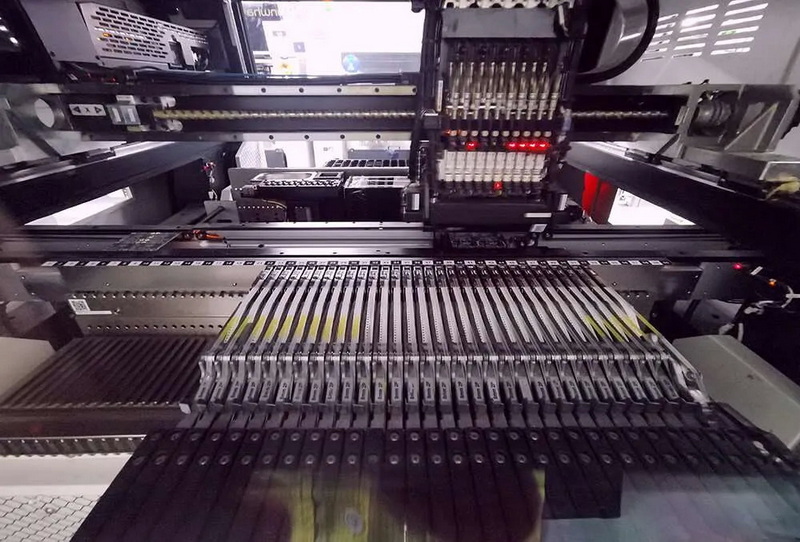
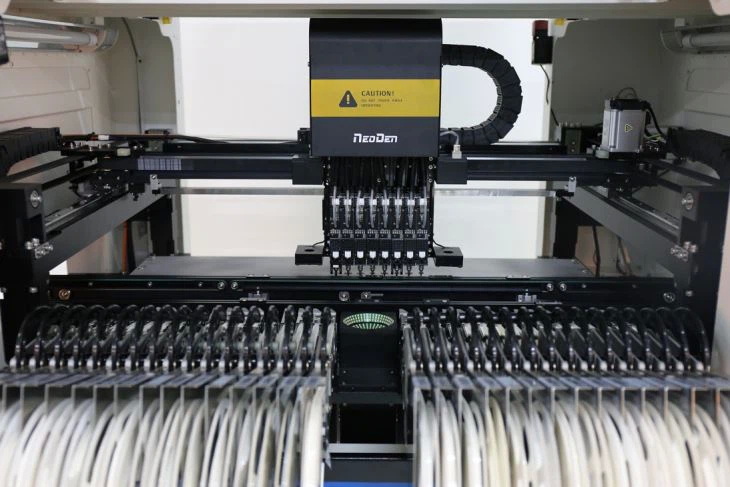
1. Use a pick-and-place machine for accuracy and speed
2. For small quantities or your first prototype, manual placement with tweezers can suffice
3. Ensure correct orientation of all components
4. Double-check placement against your assembly drawing
Take your time with this step, as correct component placement is crucial for a successful first PCB SMT prototype[2].
Reflow Soldering
The final step in SMT assembly is reflow soldering:
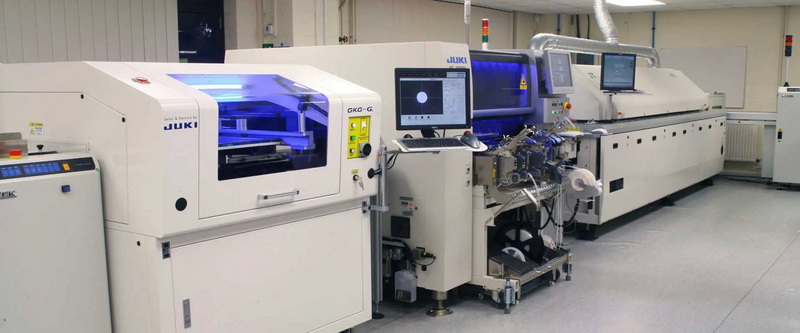
1. Place the populated PCB into a reflow oven
2. Set the temperature profile according to the solder paste specifications
3. Monitor the process to ensure even heating and cooling
For your first PCB SMT prototype, you might use a smaller, benchtop reflow oven, which offers good control for small-scale production[2].
Testing and Debugging Your First PCB SMT Prototype
Visual Inspection
Start with a thorough visual inspection of your assembled PCB:
1. Check for misaligned or missing components
2. Look for solder bridges or insufficient solder joints
3. Inspect for any signs of damage or overheating
A magnifying glass or microscope can be invaluable for this step, especially for your first PCB SMT prototype with potentially small components[5].
Electrical Testing
Perform electrical tests to ensure your prototype functions as intended:
1. Continuity testing: Check for proper connections
2. Power-on testing: Verify correct voltage levels
3. Functional testing: Run through all intended operations of your circuit
Start with basic tests and progressively move to more complex ones to isolate any issues in your first PCB SMT prototype[5].
Debugging and Iteration
If you encounter issues:
1. Use diagnostic tools like oscilloscopes or logic analyzers to identify problems
2. Make necessary adjustments to your design
3. Consider producing multiple iterations of your prototype to refine the design
Remember, iteration is a normal part of the prototyping process, especially for your first PCB SMT project[5].
Scaling Up: From Prototype to Production
Once your first PCB SMT prototype meets all requirements, you can consider scaling up to production:
1. Optimize your design for mass production
2. Consider design for assembly (DFA) principles
3. Evaluate and select a contract manufacturer
4. Implement quality control measures
The experience gained from your first PCB SMT prototype will be invaluable as you move towards larger-scale production[7].
Conclusion
Embarking on your first PCB SMT prototyping journey can be challenging, but it's also an exciting and rewarding process. By following this comprehensive guide, you'll be well-equipped to navigate the complexities of SMT prototyping. Remember, the key to success lies in careful planning, attention to detail, and a willingness to learn and iterate. Your first PCB SMT prototype is not just a product; it's a valuable learning experience that will inform all your future PCB design endeavors.

FAQ
1. What are the main advantages of SMT for my first PCB prototype?
SMT offers several advantages for your first PCB prototype:
- Smaller component size, allowing for more compact designs
- Higher component density, enabling more complex circuits in a smaller area
- Improved performance due to shorter electrical paths
- Lower production costs for medium to high-volume production
- Better mechanical performance under shake and vibration conditions
2. How do I choose the right components for my first PCB SMT prototype?
When selecting components for your first PCB SMT prototype, consider:
- Package types: Start with common, easy-to-work-with packages like SOT-23 or SOIC
- Availability: Ensure components are readily available to avoid delays
- Cost: Balance performance with budget constraints
- Thermal considerations: Be aware of any special thermal management requirements
3. What should I consider when designing the layout for my first PCB SMT prototype?
Key considerations for your first PCB SMT prototype layout include:
- Component placement: Group related components and consider signal flow
- Trace routing: Keep traces short and avoid right angles
- Power and ground planes: Use copper pours for efficient power distribution
- Thermal management: Consider heat dissipation for power-intensive components
- Design for manufacturing (DFM): Follow design rules that ensure manufacturability
4. How do I prepare my design files for fabrication of my first PCB SMT prototype?
To prepare your design files for fabrication:
- Generate Gerber files containing the PCB layout information
- Create a drill file specifying hole locations and sizes
- Produce a bill of materials (BOM) listing all components with their specifications
- Develop an assembly drawing to guide the placement of components
5. What steps should I take to test and debug my first PCB SMT prototype?
To test and debug your first PCB SMT prototype:
- Perform a thorough visual inspection, checking for misaligned components or solder issues
- Conduct electrical tests, including continuity testing and power-on testing
- Run functional tests to verify all intended operations of your circuit
- Use diagnostic tools like oscilloscopes or logic analyzers to identify and resolve any issues
- Be prepared to iterate on your design if necessary
Citations:
[1] https://jlcpcb.com/blog/design-process-of-a-surface-mount-pcb
[2] https://patents.google.com/patent/CN112040669B/zh
[3] https://www.anypcba.com/blogs/pcb-assembly-knowledge/proto-pcb-a-comprehensive-guide-to-prototyping-circuit-boards.html
[4] https://suddendocs.samtec.com/processing/edge-mount-processing-ch.pdf
[5] https://www.viasion.com/blog/step-by-step-guide-to-pcb-prototyping/
[6] https://blog.abyssdawn.com/archives/52.html
[7] https://www.viasion.com/blog/pcb-board-prototyping-beginners-guide/
[8] https://www.ipcb.com/tw/news/4462.html


