Content Menu
● Understanding Surface Mount Technology
>> What is Surface Mount Technology?
>> Advantages of Surface Mount Technology
● Getting Started with Surface Mount Technology
>> Step 1: Familiarize Yourself with SMT Components
>> Step 2: Gather the Necessary Tools and Equipment
>> Step 3: Learn the Basics of PCB Design
>> Step 4: Practice Soldering Techniques
>> Step 5: Assemble Your First SMT Project
>> Step 6: Troubleshooting Common Issues
● Conclusion
● FAQ
>> 1. What is the difference between SMT and through-hole technology?
>> 2. What tools do I need to start with Surface Mount Technology?
>> 3. How can I improve my soldering skills?
>> 4. What are some common issues in SMT assembly?
>> 5. Where can I find resources to learn more about SMT?
Surface Mount Technology (SMT) has revolutionized the electronics manufacturing industry, allowing for smaller, more efficient, and more reliable electronic devices. For beginners, diving into SMT can seem daunting due to the technical jargon and the variety of tools and techniques involved. However, with the right guidance and resources, anyone can learn to navigate this exciting field. This article serves as a comprehensive tutorial for beginners looking to get started with Surface Mount Technology.

Understanding Surface Mount Technology
What is Surface Mount Technology?
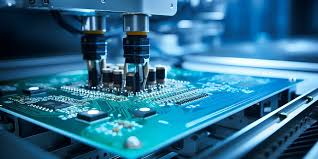
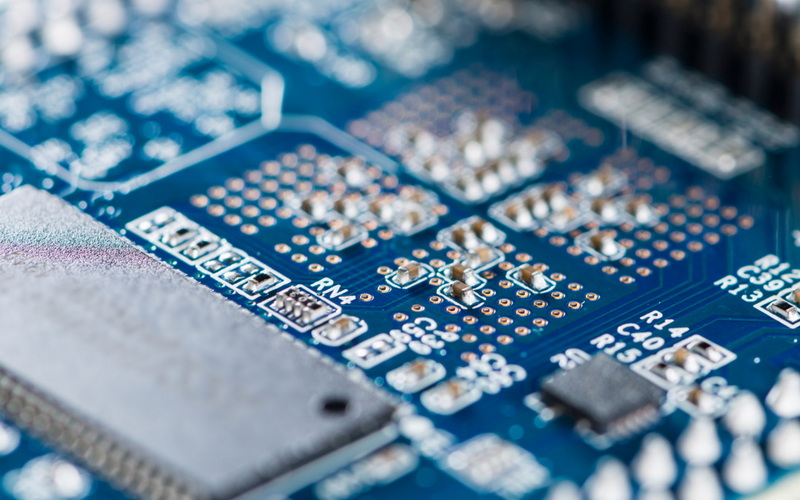
Surface Mount Technology is a method used to mount electronic components directly onto the surface of printed circuit boards (PCBs). Unlike traditional through-hole technology, where components are inserted into holes drilled in the PCB, SMT components are soldered onto pads on the surface. This technique allows for a more compact design, higher component density, and improved performance.
Advantages of Surface Mount Technology
1. Space Efficiency: SMT components are generally smaller than their through-hole counterparts, allowing for more components to fit on a single PCB.
2. Improved Performance: The shorter leads of SMT components reduce inductance and resistance, leading to better electrical performance.
3. Automated Assembly: SMT is highly compatible with automated assembly processes, which can significantly reduce manufacturing costs and time.
4. Design Flexibility: Designers have more freedom to create complex circuit layouts without the constraints of through-hole mounting.
Getting Started with Surface Mount Technology
Step 1: Familiarize Yourself with SMT Components
Before diving into the practical aspects of SMT, it's essential to understand the various types of components used in this technology. Common SMT components include:
- Resistors: Used to limit current flow.
- Capacitors: Store and release electrical energy.
- Diodes: Allow current to flow in one direction.
- Integrated Circuits (ICs): Combine multiple functions into a single package.
- Inductors: Store energy in a magnetic field.
Each component has specific characteristics and applications, so take the time to learn about them.
Step 2: Gather the Necessary Tools and Equipment
To get started with SMT, you will need a variety of tools and equipment. Here's a list of essential items:
- Soldering Iron: A fine-tipped soldering iron is crucial for working with small SMT components.
- Solder: Use lead-free solder for a safer and more environmentally friendly option.
- Tweezers: Precision tweezers are necessary for handling small components.
- Solder Paste: This is used to attach components to the PCB before soldering.
- Stencil: A stencil helps apply solder paste accurately to the PCB pads.
- Hot Air Rework Station: Useful for soldering and desoldering SMT components.
- Multimeter: For testing and troubleshooting circuits.
- PCB Holder: Keeps the PCB stable while you work on it.
Step 3: Learn the Basics of PCB Design
Understanding PCB design is crucial for anyone working with SMT. You can use software like Eagle, KiCAD, or Altium Designer to create your PCB layouts. Here are some key concepts to keep in mind:
- Footprint: Each component has a specific footprint that defines how it will be mounted on the PCB.
- Trace Width: The width of the traces on the PCB must be calculated based on the current they will carry.
- Layer Stackup: Understanding how many layers your PCB will have and how they will be arranged is essential for complex designs.

Step 4: Practice Soldering Techniques
Soldering is a critical skill in SMT. Here are some techniques to practice:
- Tack Soldering: This involves applying a small amount of solder to hold a component in place before fully soldering it.
- Drag Soldering: A technique used for soldering multiple pins of an IC at once.
- Reflow Soldering: This method uses heat to melt solder paste and create connections between the component and the PCB.
Step 5: Assemble Your First SMT Project
Once you have a good grasp of the tools and techniques, it's time to assemble your first SMT project. Start with a simple circuit, such as a basic LED circuit or a small amplifier. Follow these steps:
1. Design the PCB: Use your PCB design software to create a layout for your project.
2. Print the PCB: You can either etch your own PCB or use a PCB manufacturing service.
3. Apply Solder Paste: Use a stencil to apply solder paste to the pads on the PCB.
4. Place Components: Use tweezers to carefully place the SMT components onto the solder paste.
5. Reflow the Solder: Use a hot air rework station or a reflow oven to heat the PCB and melt the solder.
6. Test the Circuit: Once the solder has cooled, use a multimeter to test your circuit for continuity and functionality.
Step 6: Troubleshooting Common Issues
As a beginner, you may encounter several common issues when working with SMT. Here are some troubleshooting tips:
- Cold Solder Joints: If a connection is not solid, it may be due to insufficient heat during soldering. Reheat the joint and add more solder if necessary.
- Bridging: This occurs when solder connects two pads that should be separate. Use a solder wick to absorb excess solder and correct the issue.
- Component Misalignment: If a component is not aligned correctly, use tweezers to reposition it before reflowing the solder.
Conclusion
Getting started with Surface Mount Technology can be an exciting journey for beginners. By familiarizing yourself with SMT components, gathering the right tools, learning PCB design, practicing soldering techniques, and assembling your first project, you can build a solid foundation in this field. Remember that practice is key, and don't hesitate to seek out additional resources, such as online tutorials and forums, to enhance your learning experience. With dedication and persistence, you can master Surface Mount Technology and contribute to the ever-evolving world of electronics.

FAQ
1. What is the difference between SMT and through-hole technology?
SMT involves mounting components directly on the surface of a PCB, while through-hole technology requires components to be inserted into holes drilled in the PCB. SMT allows for smaller, more compact designs and is more compatible with automated assembly processes.
2. What tools do I need to start with Surface Mount Technology?
Essential tools include a soldering iron, solder, tweezers, solder paste, a stencil, a hot air rework station, a multimeter, and a PCB holder.
3. How can I improve my soldering skills?
Practice different soldering techniques, such as tack soldering and drag soldering. Start with simple projects and gradually work your way up to more complex circuits.
4. What are some common issues in SMT assembly?
Common issues include cold solder joints, solder bridging, and component misalignment. Each can be resolved with proper techniques and troubleshooting methods.
5. Where can I find resources to learn more about SMT?
There are many online tutorials, forums, and courses available that focus on Surface Mount Technology. Websites like YouTube, electronics forums, and educational platforms offer valuable information for beginners.


